REPLACING DOME RING...
When I was researching dome options, I settled on NexDome, mainly due to availability, the cost, and ease of assembly and installation. Just by reviewing the blueprints online, even before I had the dome in front of me, I could tell that there were some strange design choices that I would have to address. I'll do a more in-depth review of NexDome in the future, after I've used it for at least one full season, but for now I'll concentrate on the primary component that I found to be inherently flawed - the dome ring.
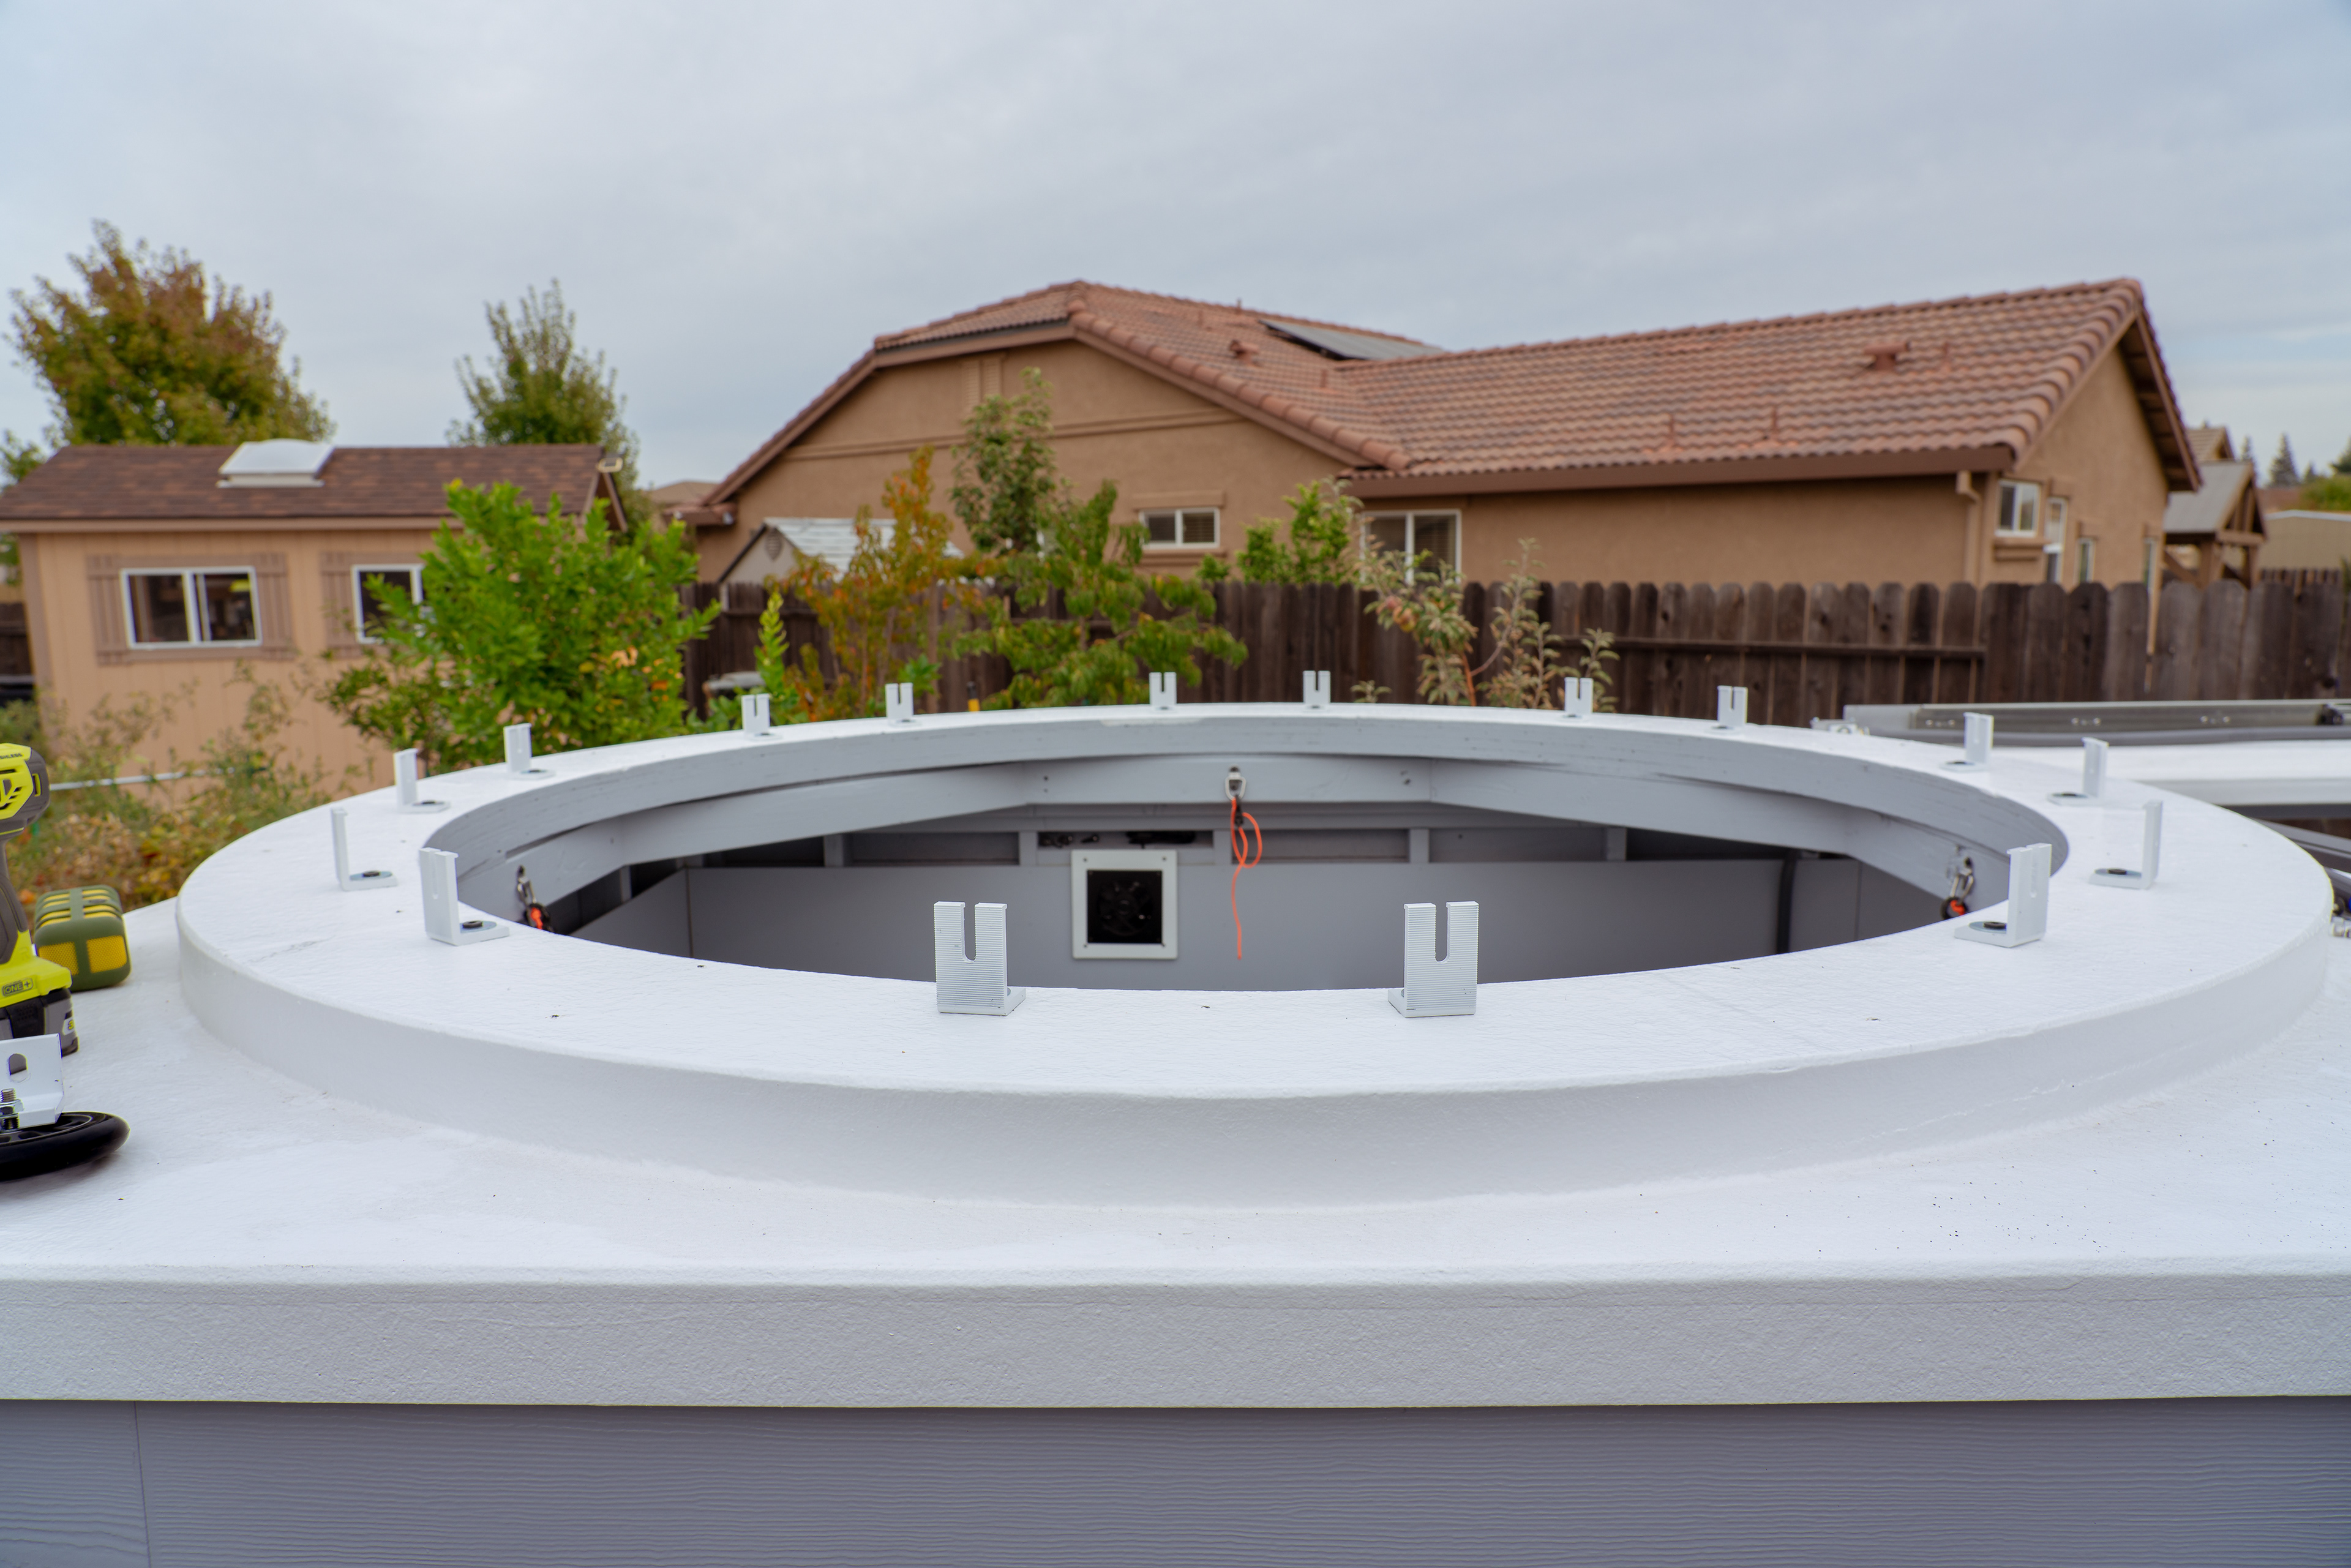
The purpose of the ring is to provide a platform which can be installed on any type of custom observatory structure (in my case a wooden box) to support the dome. The ring is made of the same ABS material that is used in the dome panels and comes in 8 identical sections that need to be assembled. These sections are a molded into funky shapes that are secured to each other via same hardware that holds angled rollers. Why? Why bother with this very unusual assembly and unnecessary design complexity that is proprietary and incorporates no apparent benefit to the overall construction of the dome? It might've made some sense when it was designed in CAD, but it simply makes no sense in practice. Allow me to elaborate...
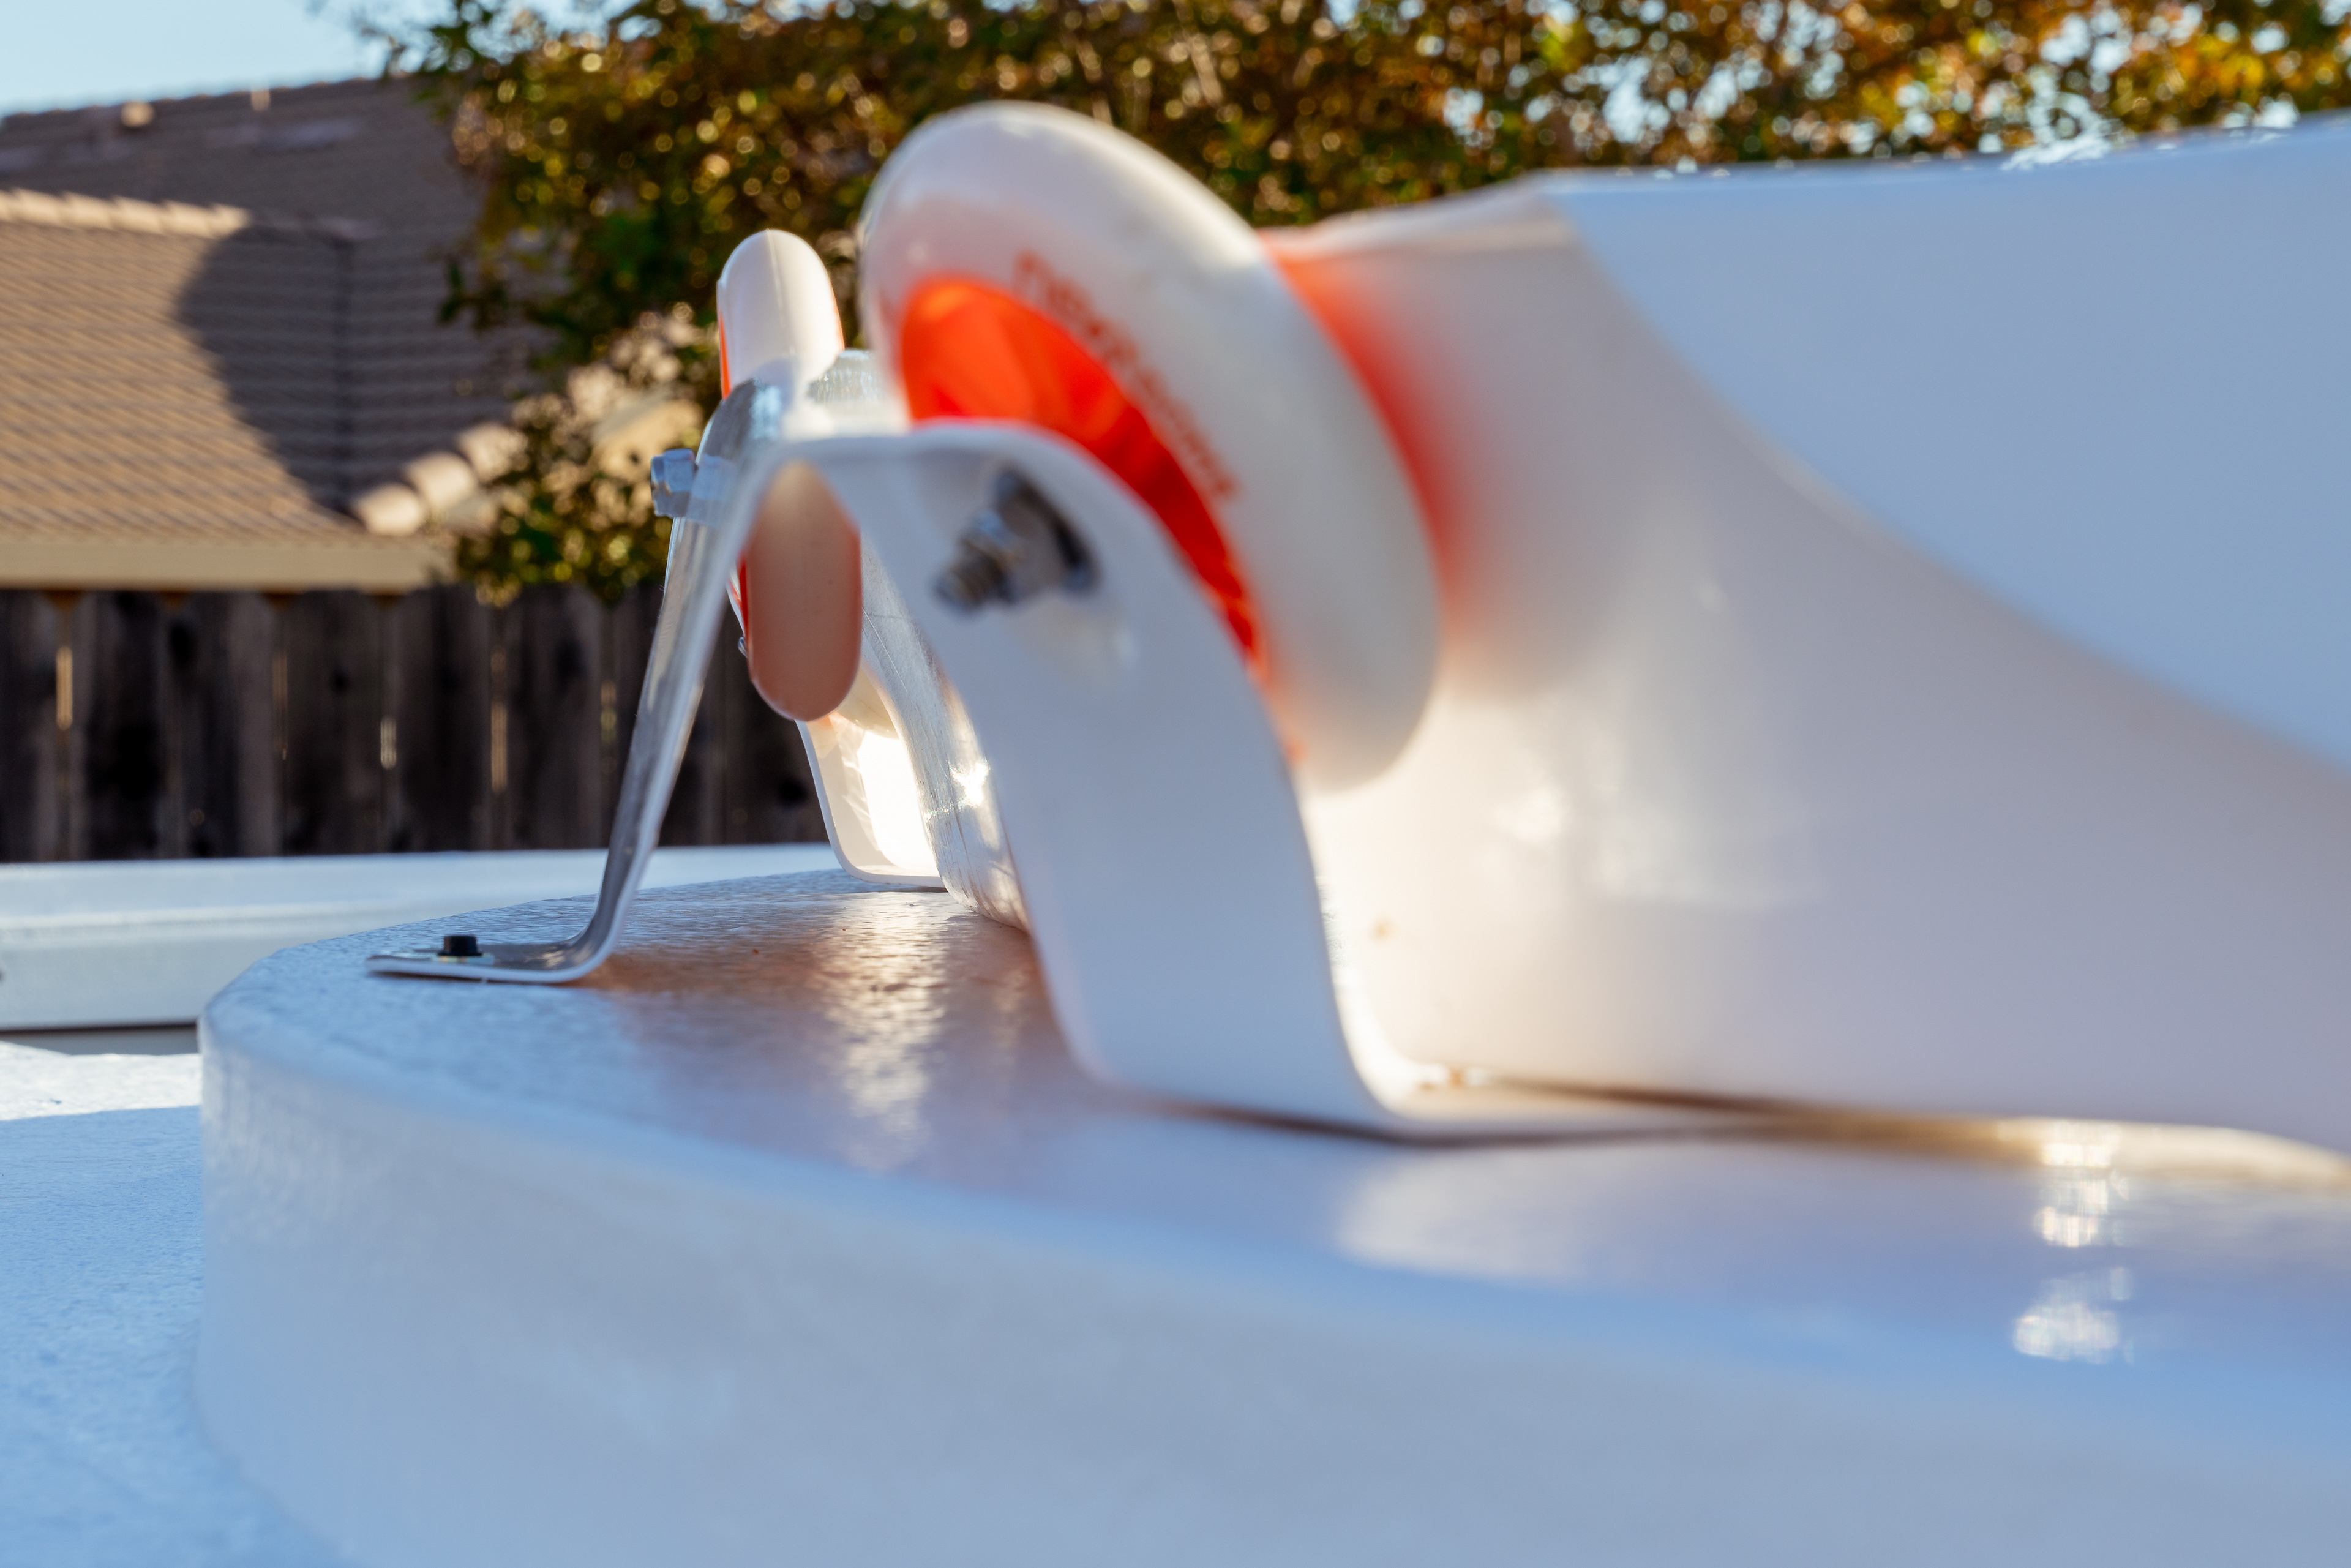
ISSUE 1: The main support rollers are fitted into cutouts in each of the sections... when bolting them in, you can either leave the rollers loose, which creates unwanted lateral movement of the rollers on their bolt "axles", or you can tighten up them up which then squeezes the entire section, deforming it and making sections uneven, relative to each other.
ISSUE 2: As the sections are installed onto a wood ring platform via screws, there's too much flex (these ABS sections feel flimsy before they are installed) and therefore too much room to have slight deviations in how far apart the edge lips are positioned when screwing them down. Any deviation will result in slight differences in height of the corresponding support roller, as it's dependent on how much the section is squeezed during installation.
ISSUE 3: Installation difficulties aside, the MAJOR problem is with the absurd gaps the ring creates due to the shape of the sections... I mean, how did this pass testing? The whole purpose of the dome is to provide a reliable weather shield around sensitive and expensive equipment! This ring design utterly defeats that purpose. To make matters worse, due to the shape of the ring sections, there is no easy way to add any sort of a "skirt" or "lip" between the dome edge and the ring to try and cover up the gaps. And no, you can't just caulk the gaps (see pictures)... the shape of the ring sections will prevent any meaningful calking efforts.
ISSUE 4: When the ring is assembled and the dome in stalled, the entire structure becomes more rigid. HOWEVER, there's still flex. It's OK in normal operation, but can present real issues in very strong winds when the dome and the ring flex, deform, and the dome ring pops off above the angled rollers. The side rollers have about a 60° angle and supposedly designed to prevent uplift of the dome as well as keep it centered on the ring. Again... I found this to be a poorly implemented design. These side rollers should've been positioned horizontally. Just the other day I watched a YouTube video of a very unfortunate incident where a combination of strong winds and the ring design resulted in the dome flying off the ring, damaging telescope equipment, and breaking the dome.
ISSUE 5: There is no practical way to adjust individual roller height or lateral position and, as I mentioned above, the flexible sections permit too much room for misalignment and varying height positioning during installation. Due to these minute height/width differences, combined with not-perfectly level dome panel alignment from one dome section to another, the rotation of the dome is not very smooth: there are bumps along the way as the dome rotates and sometimes you have to force it to get it over the roller.
Time to ditch this ring in favor of something that actually works.
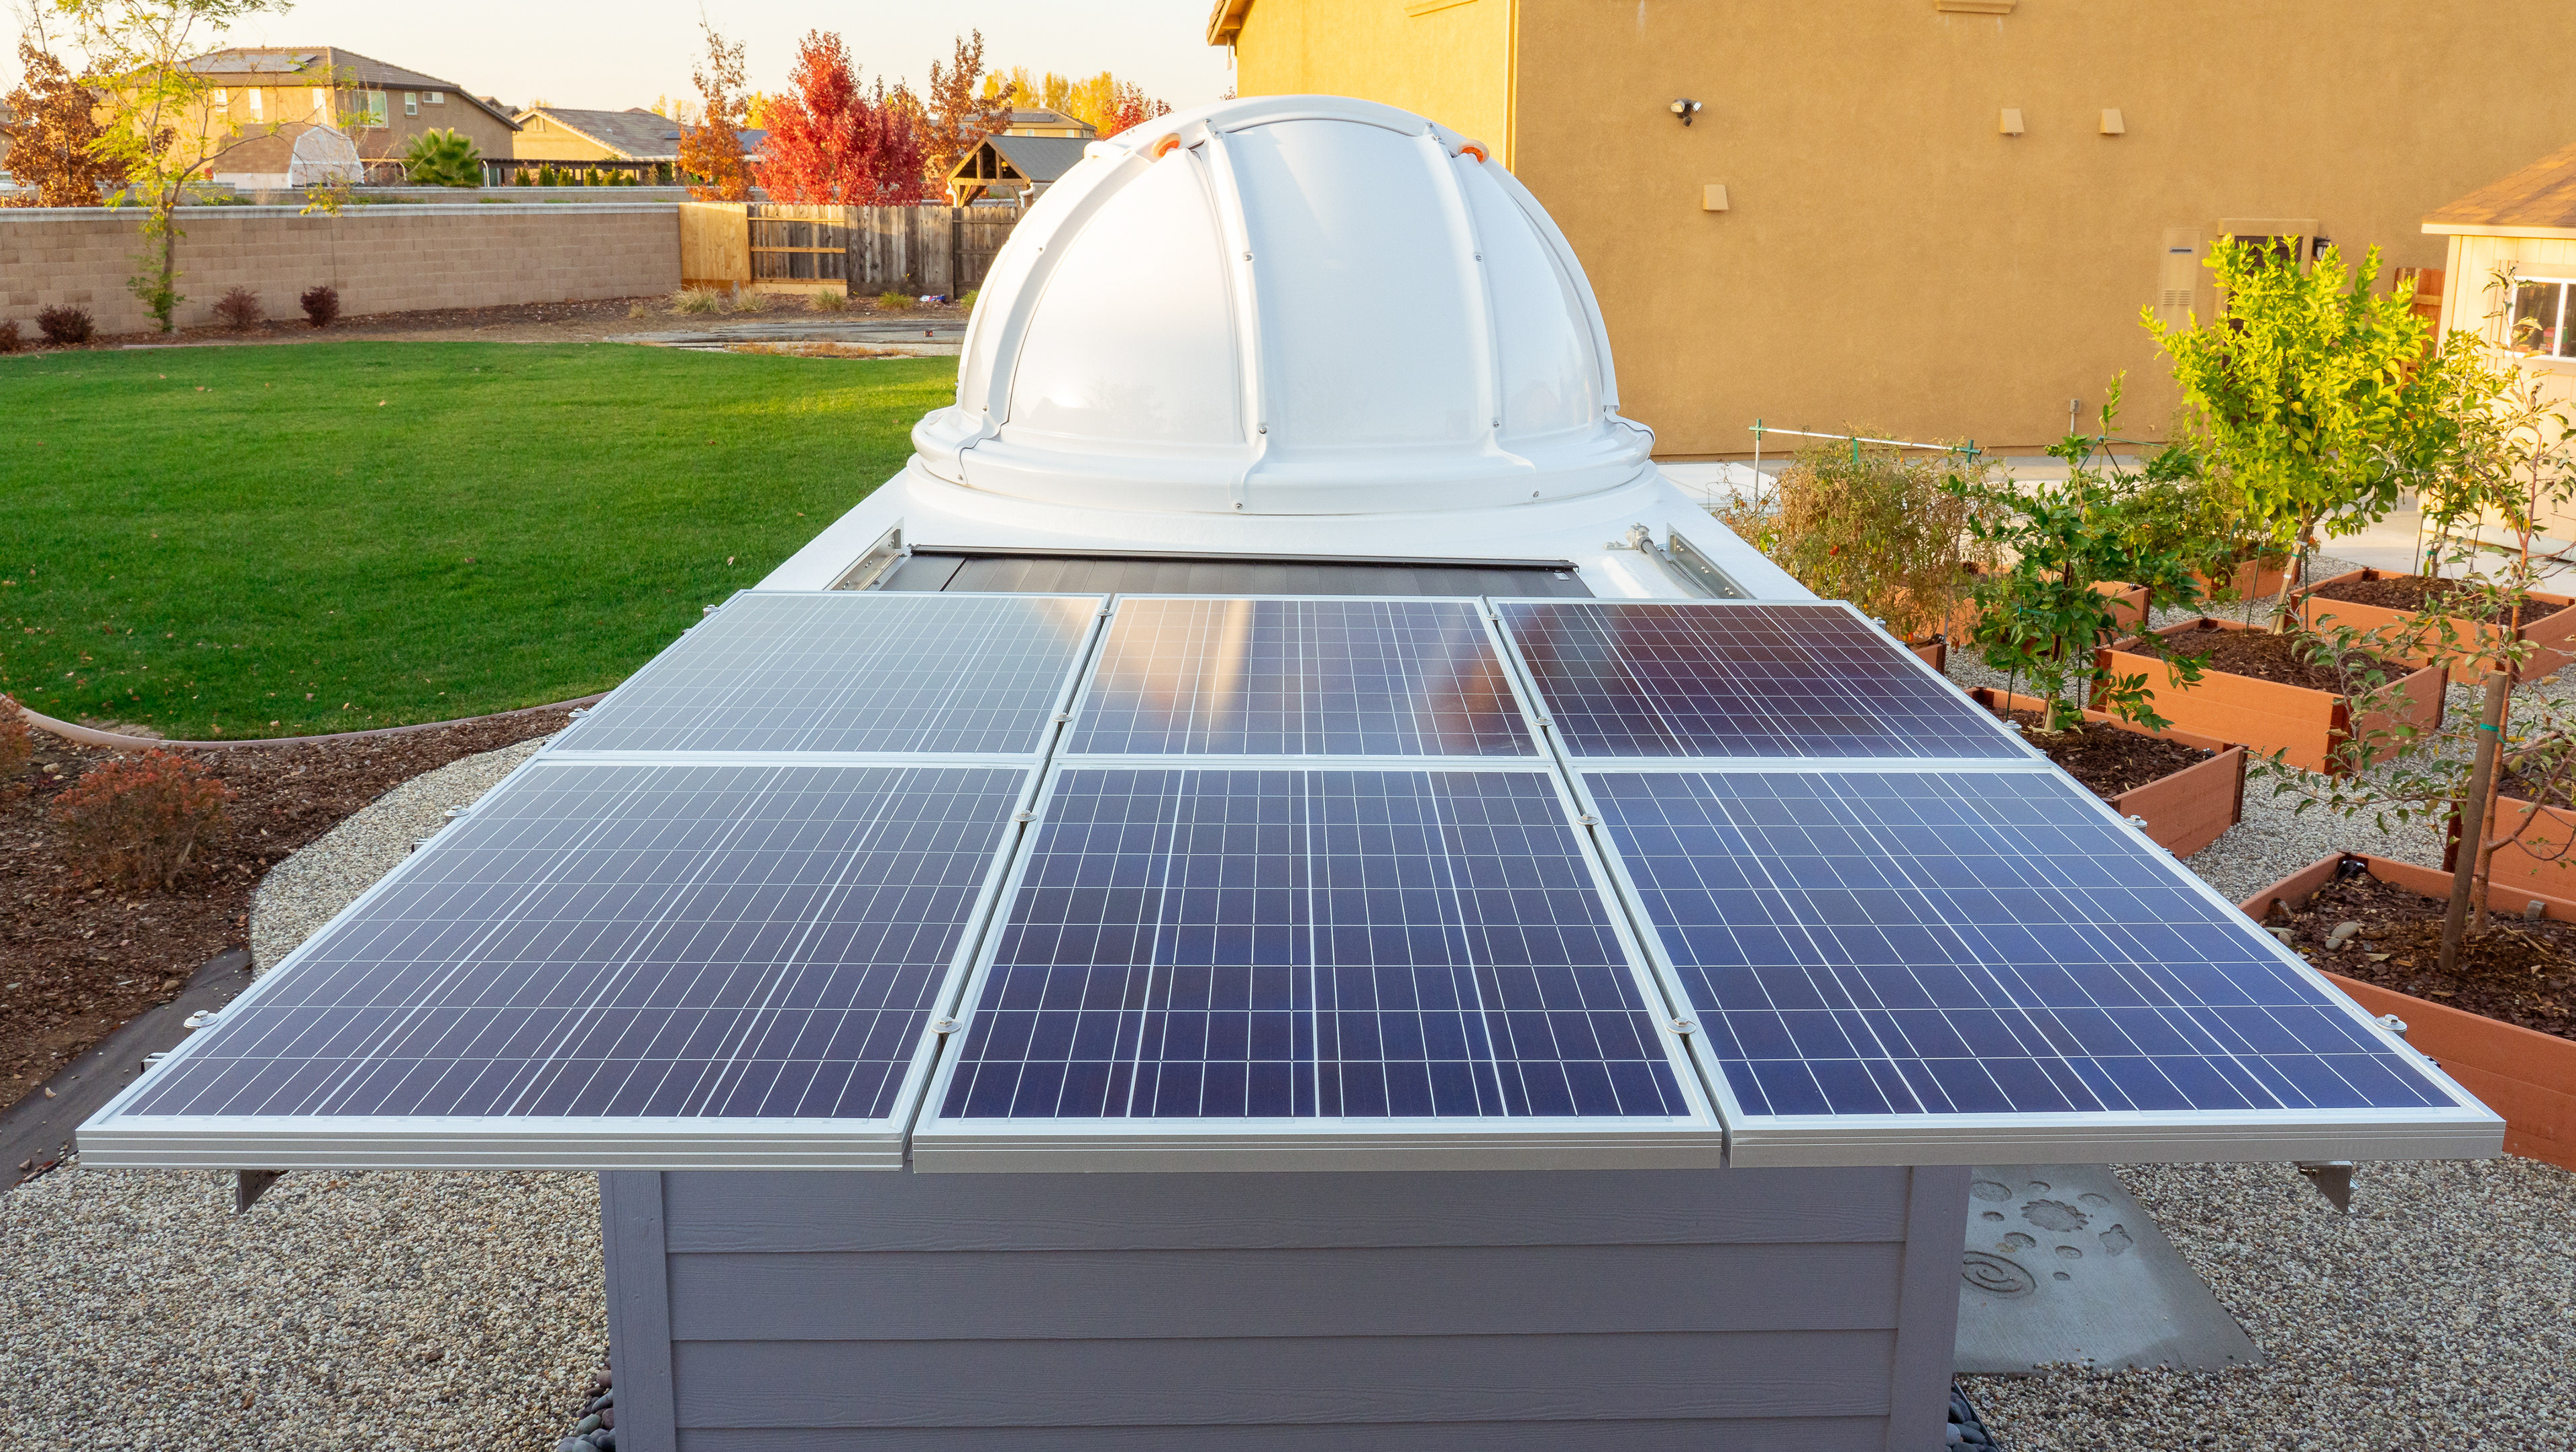
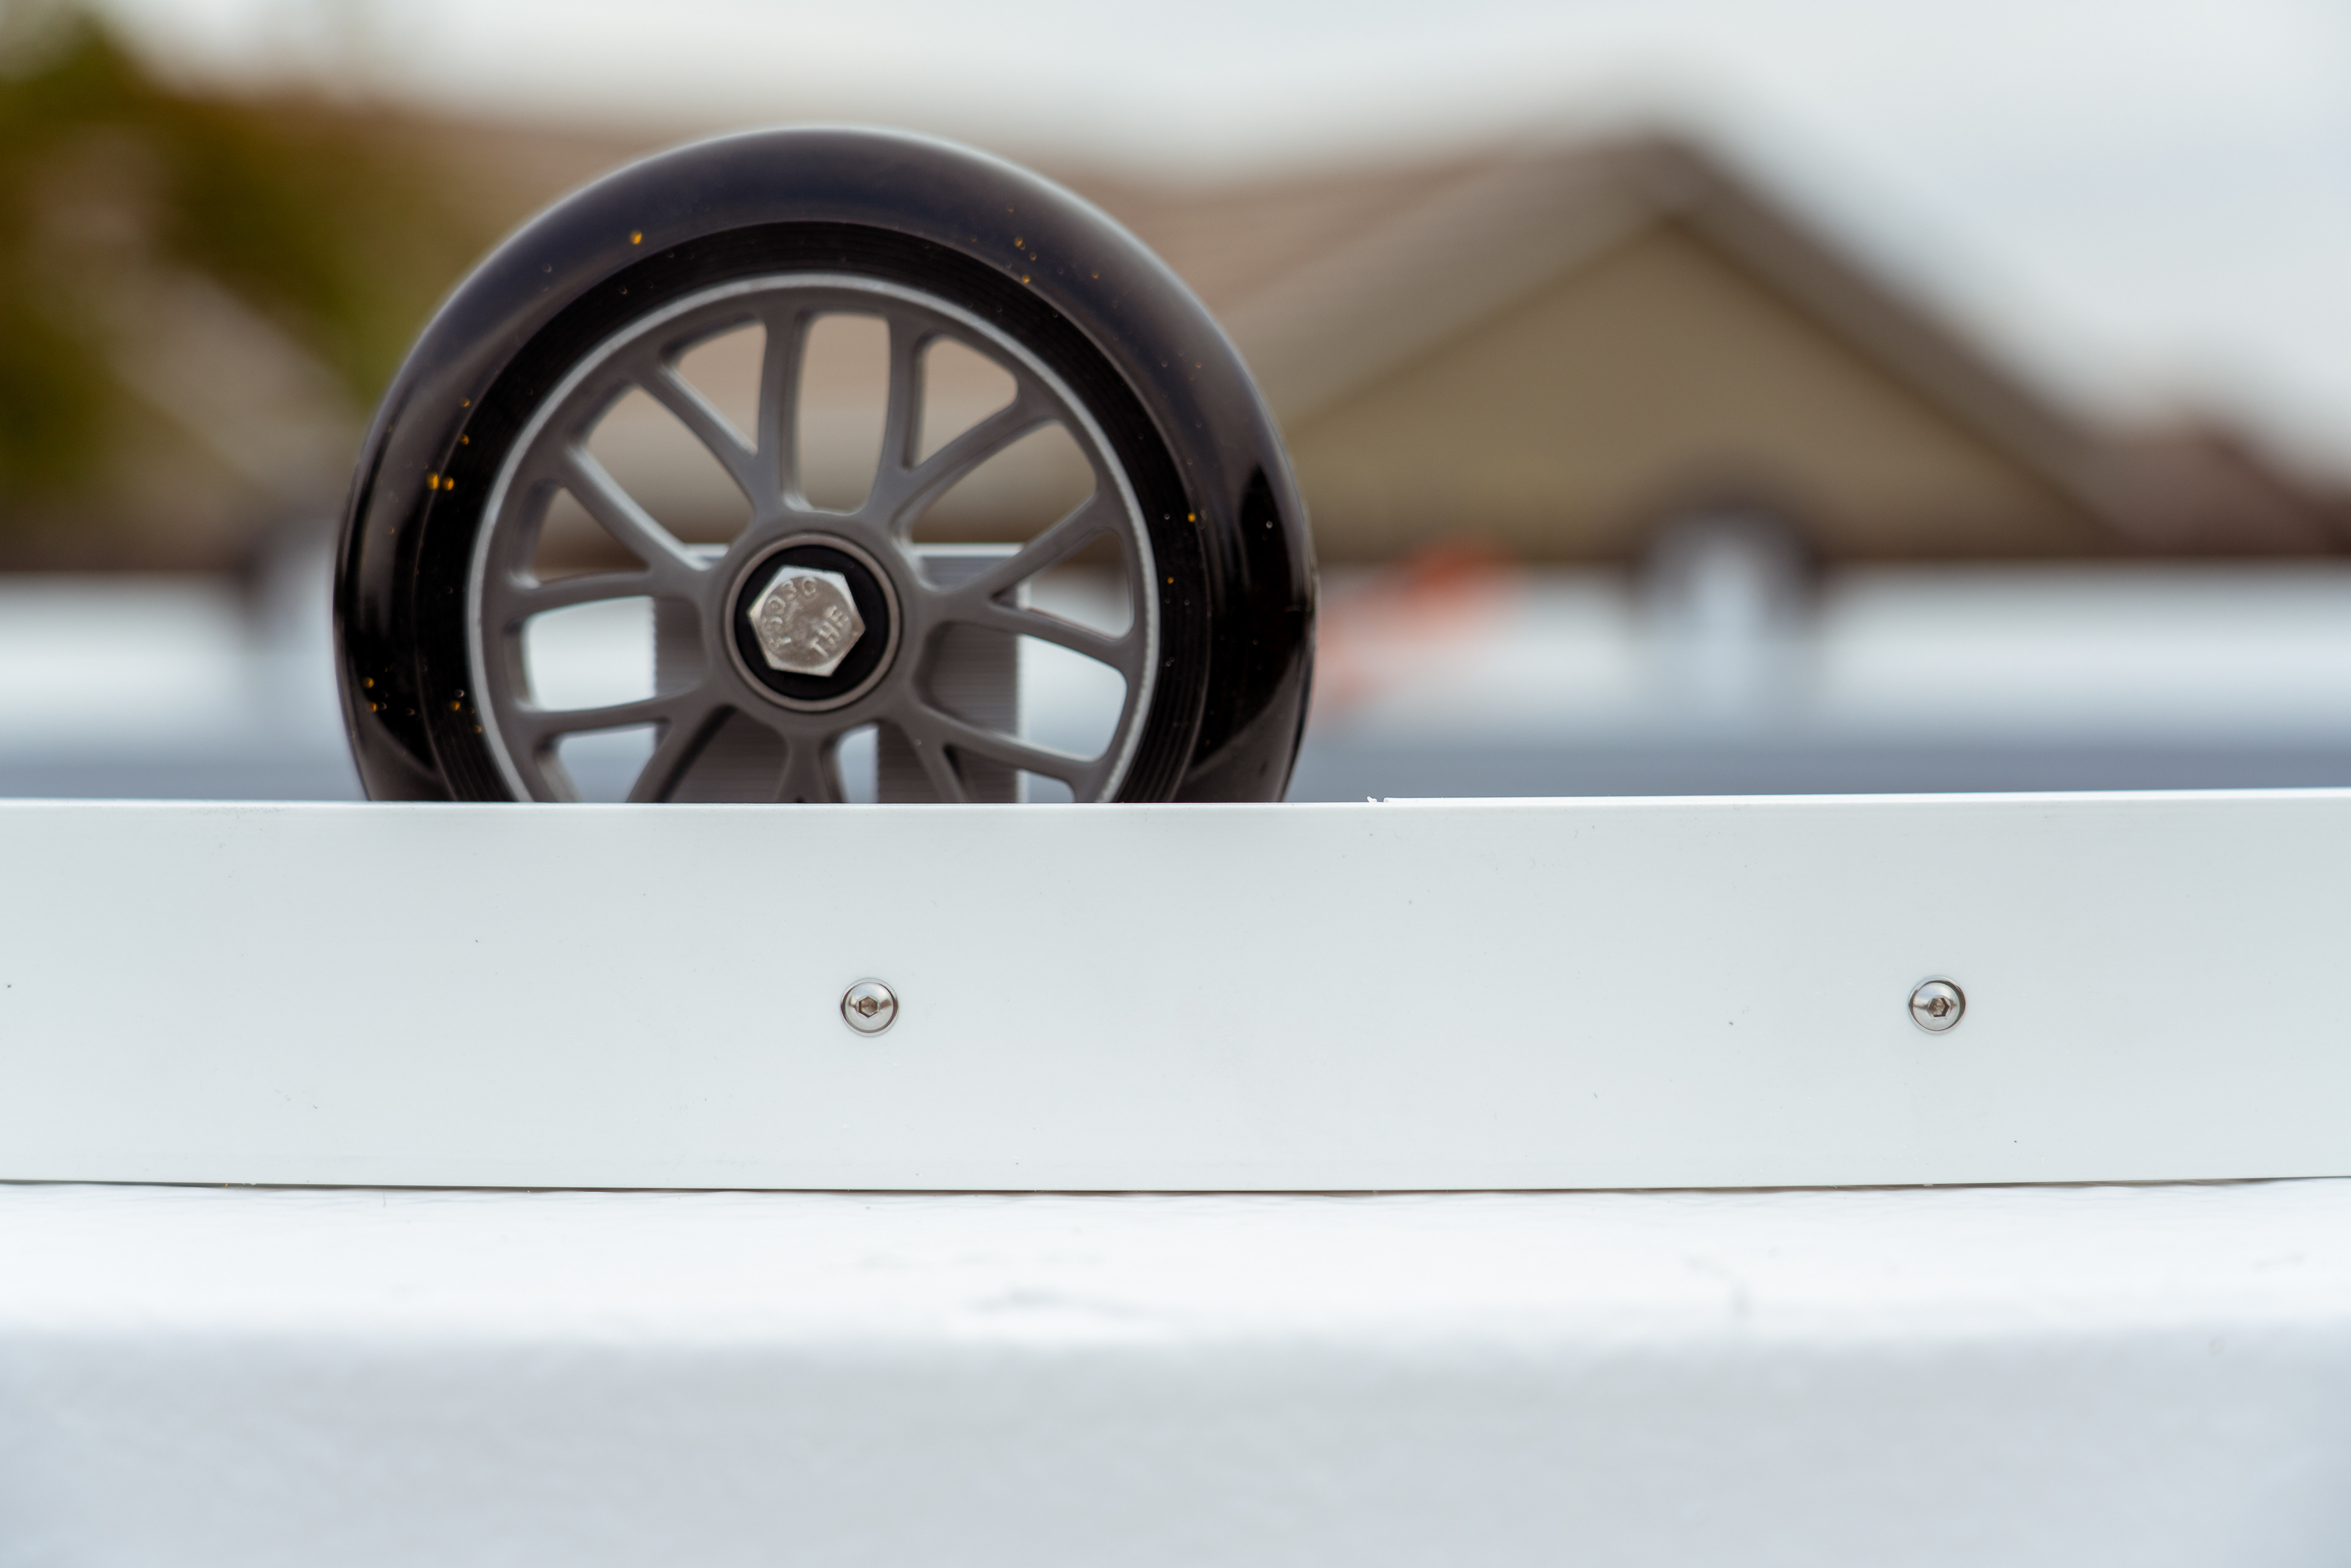
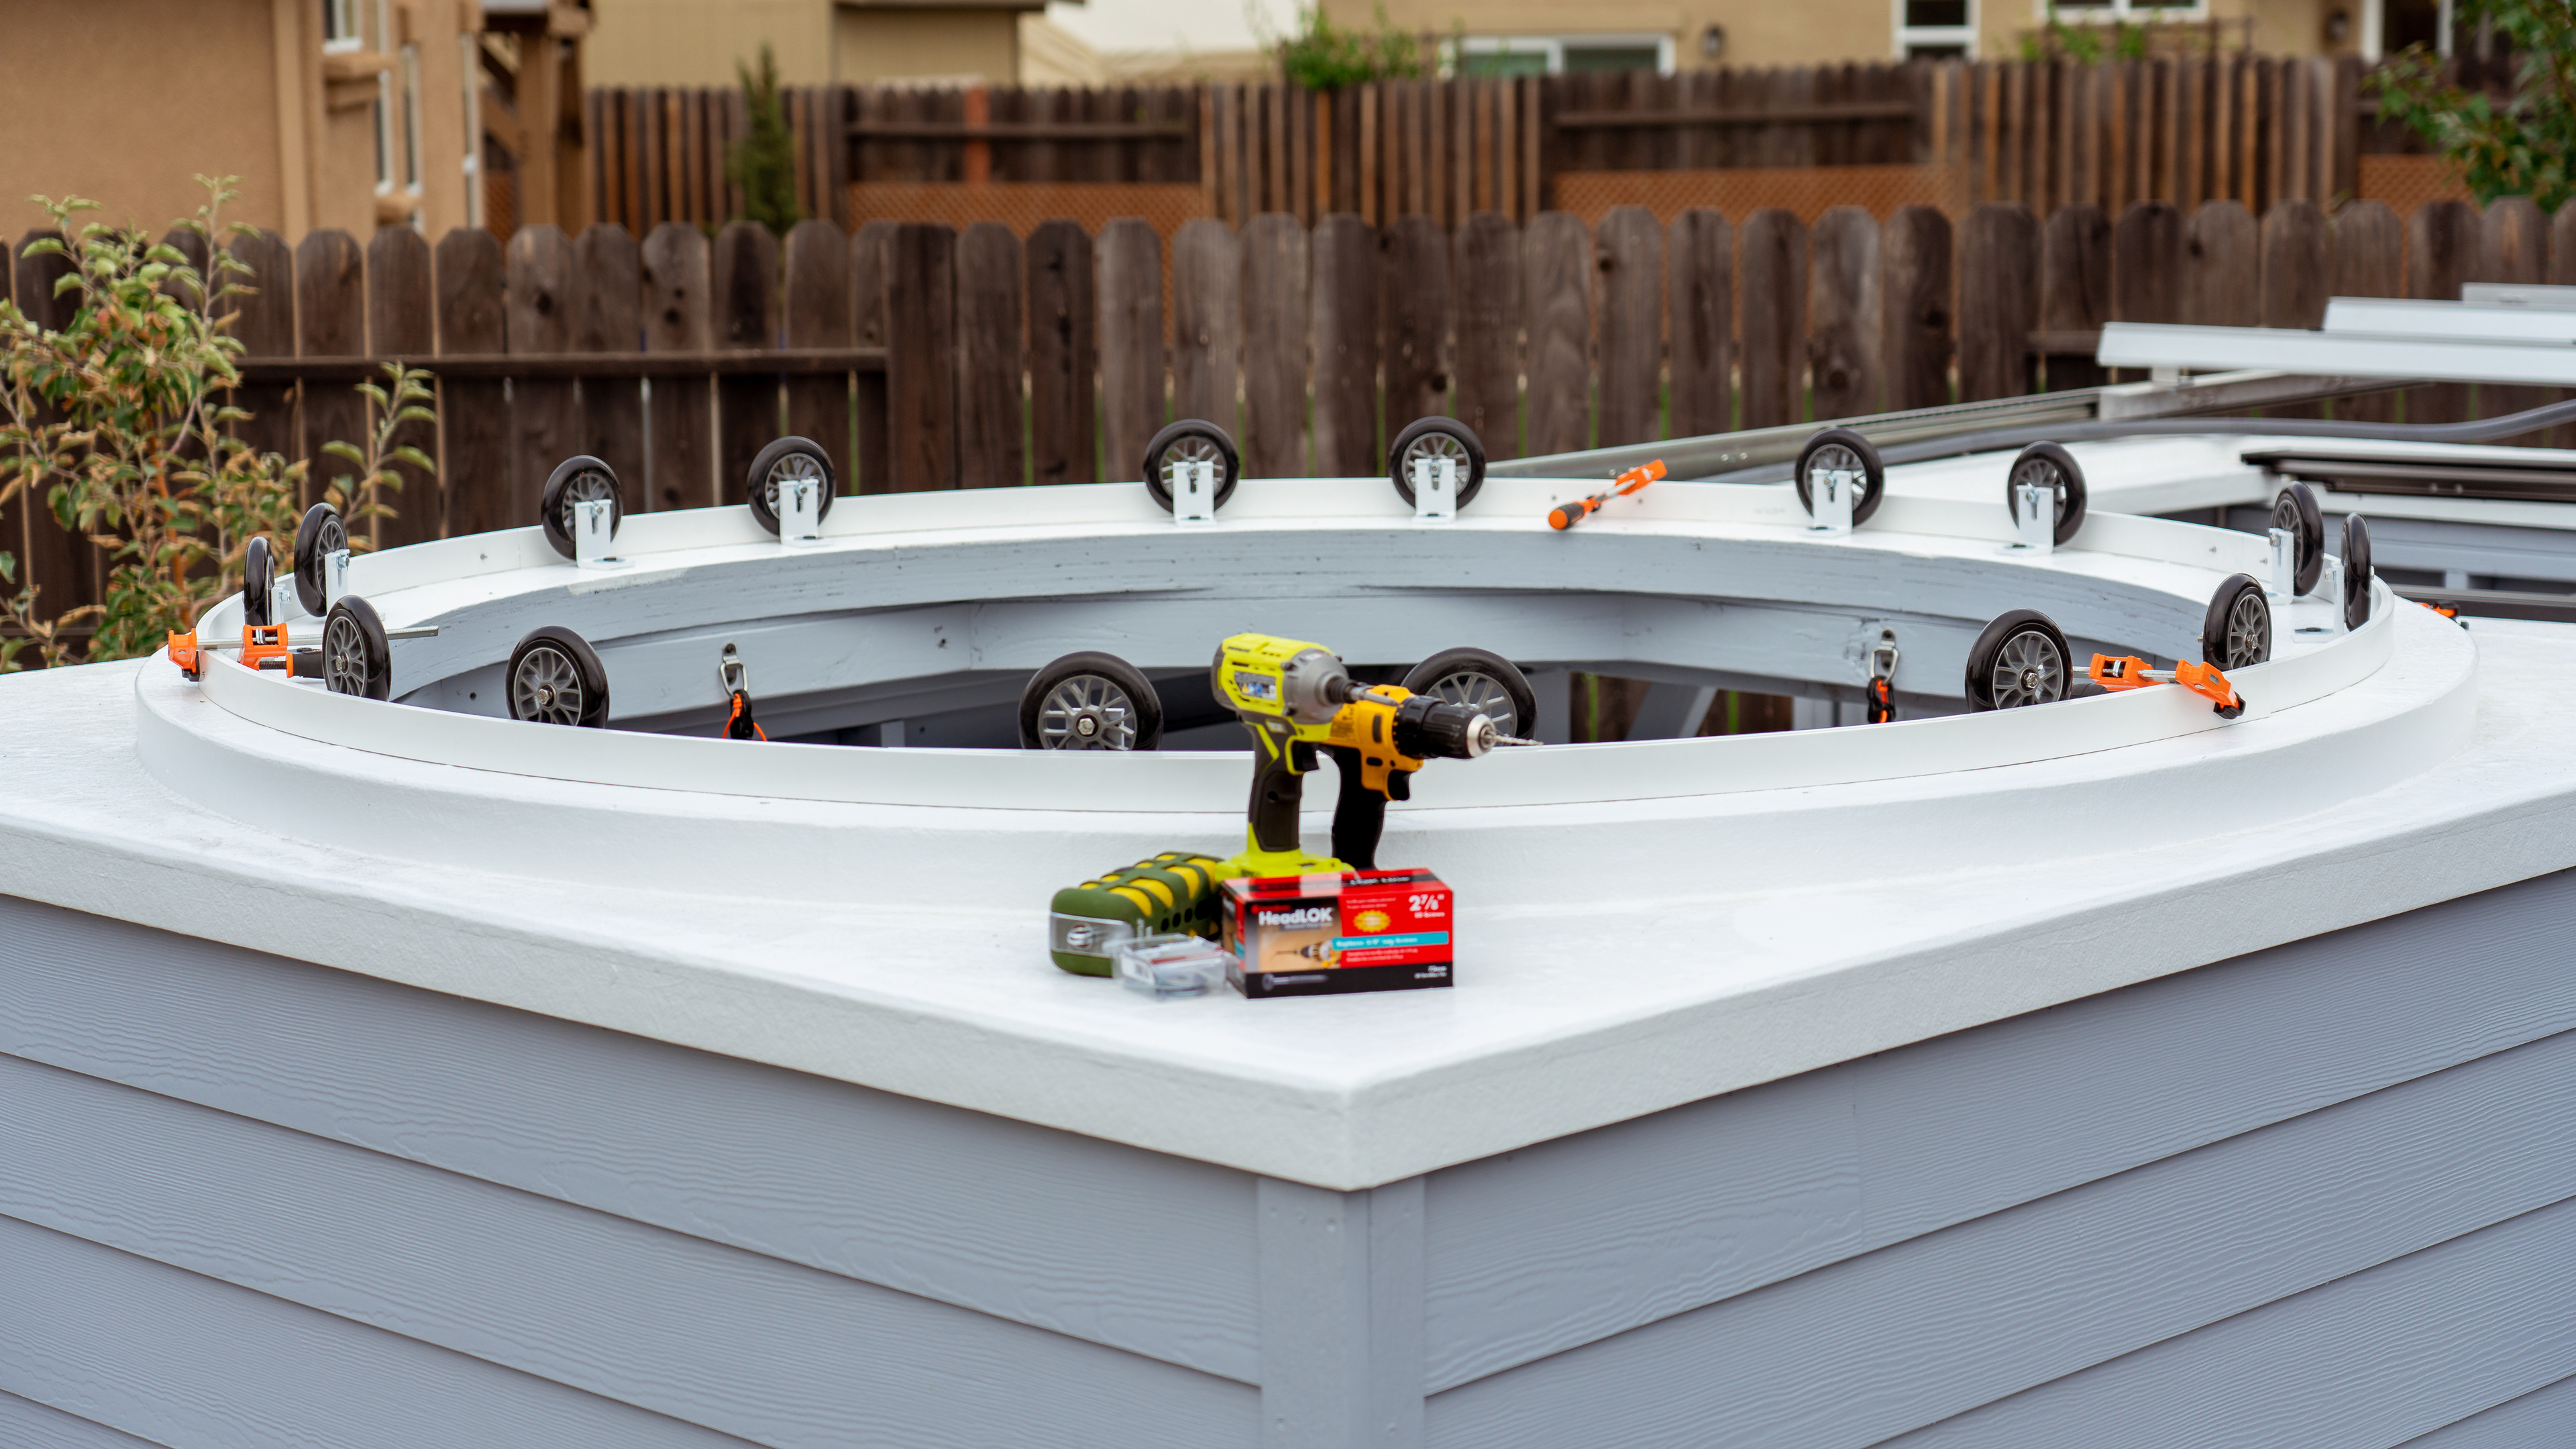
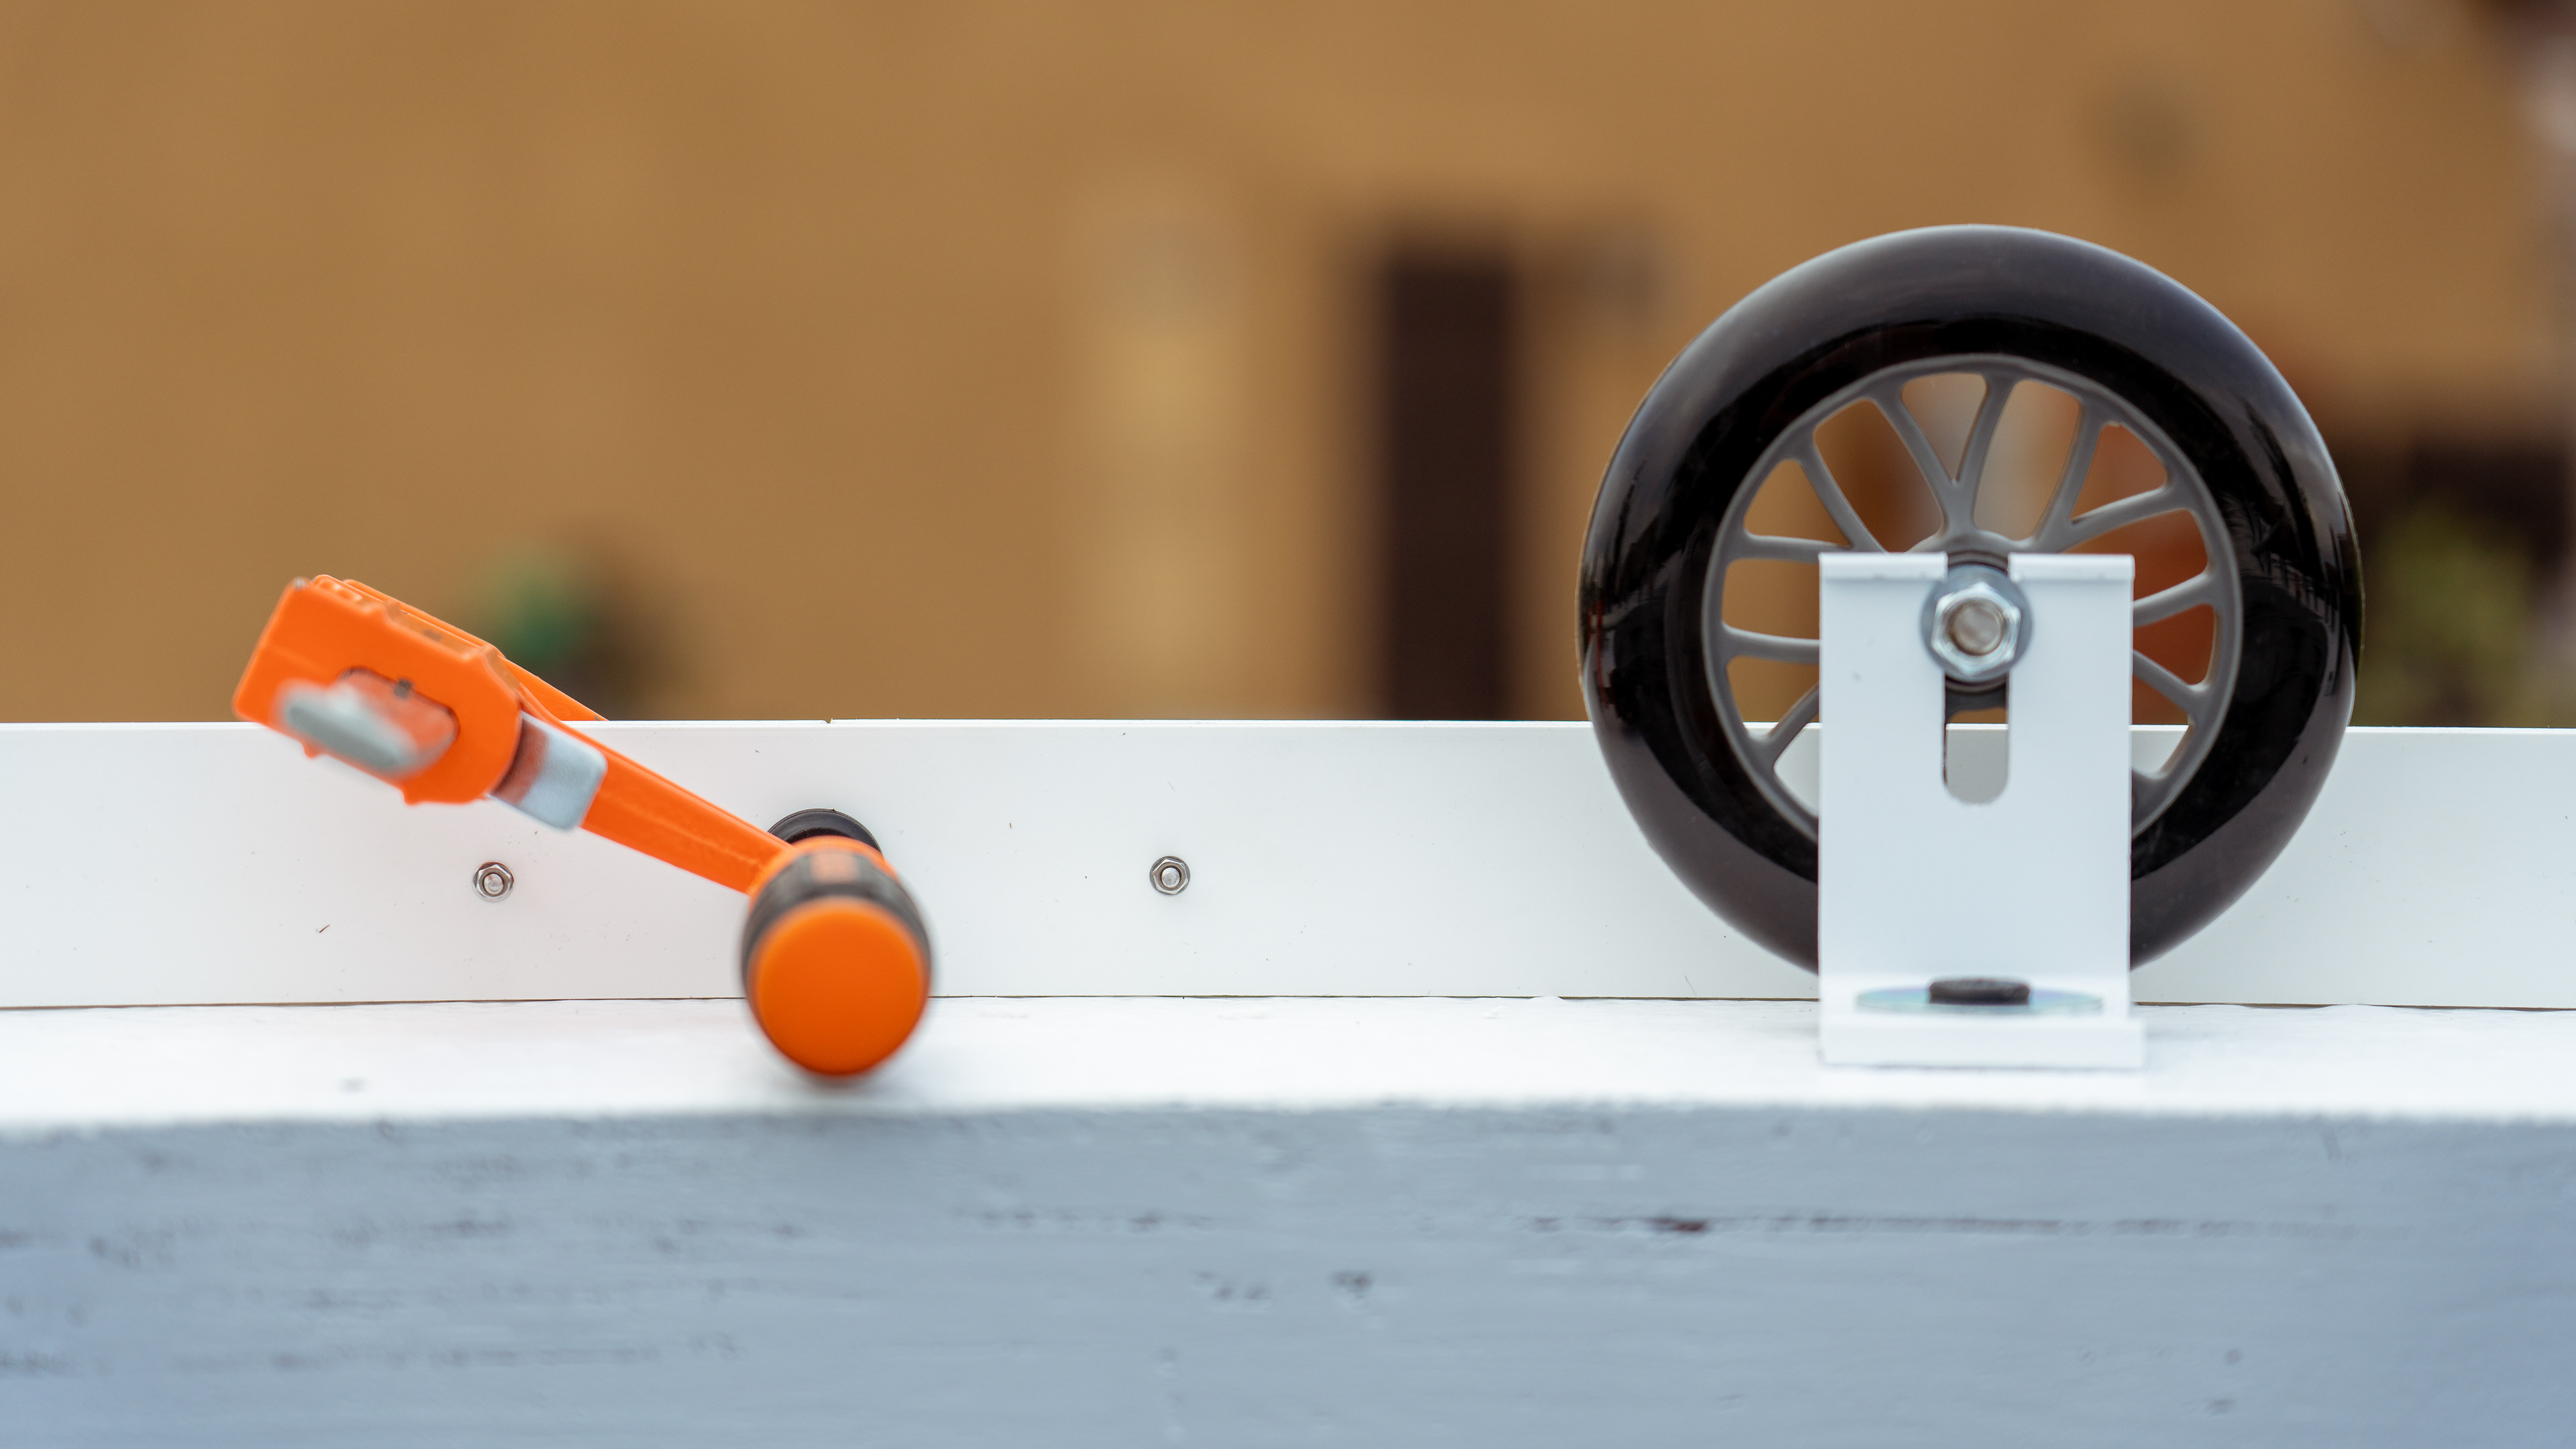
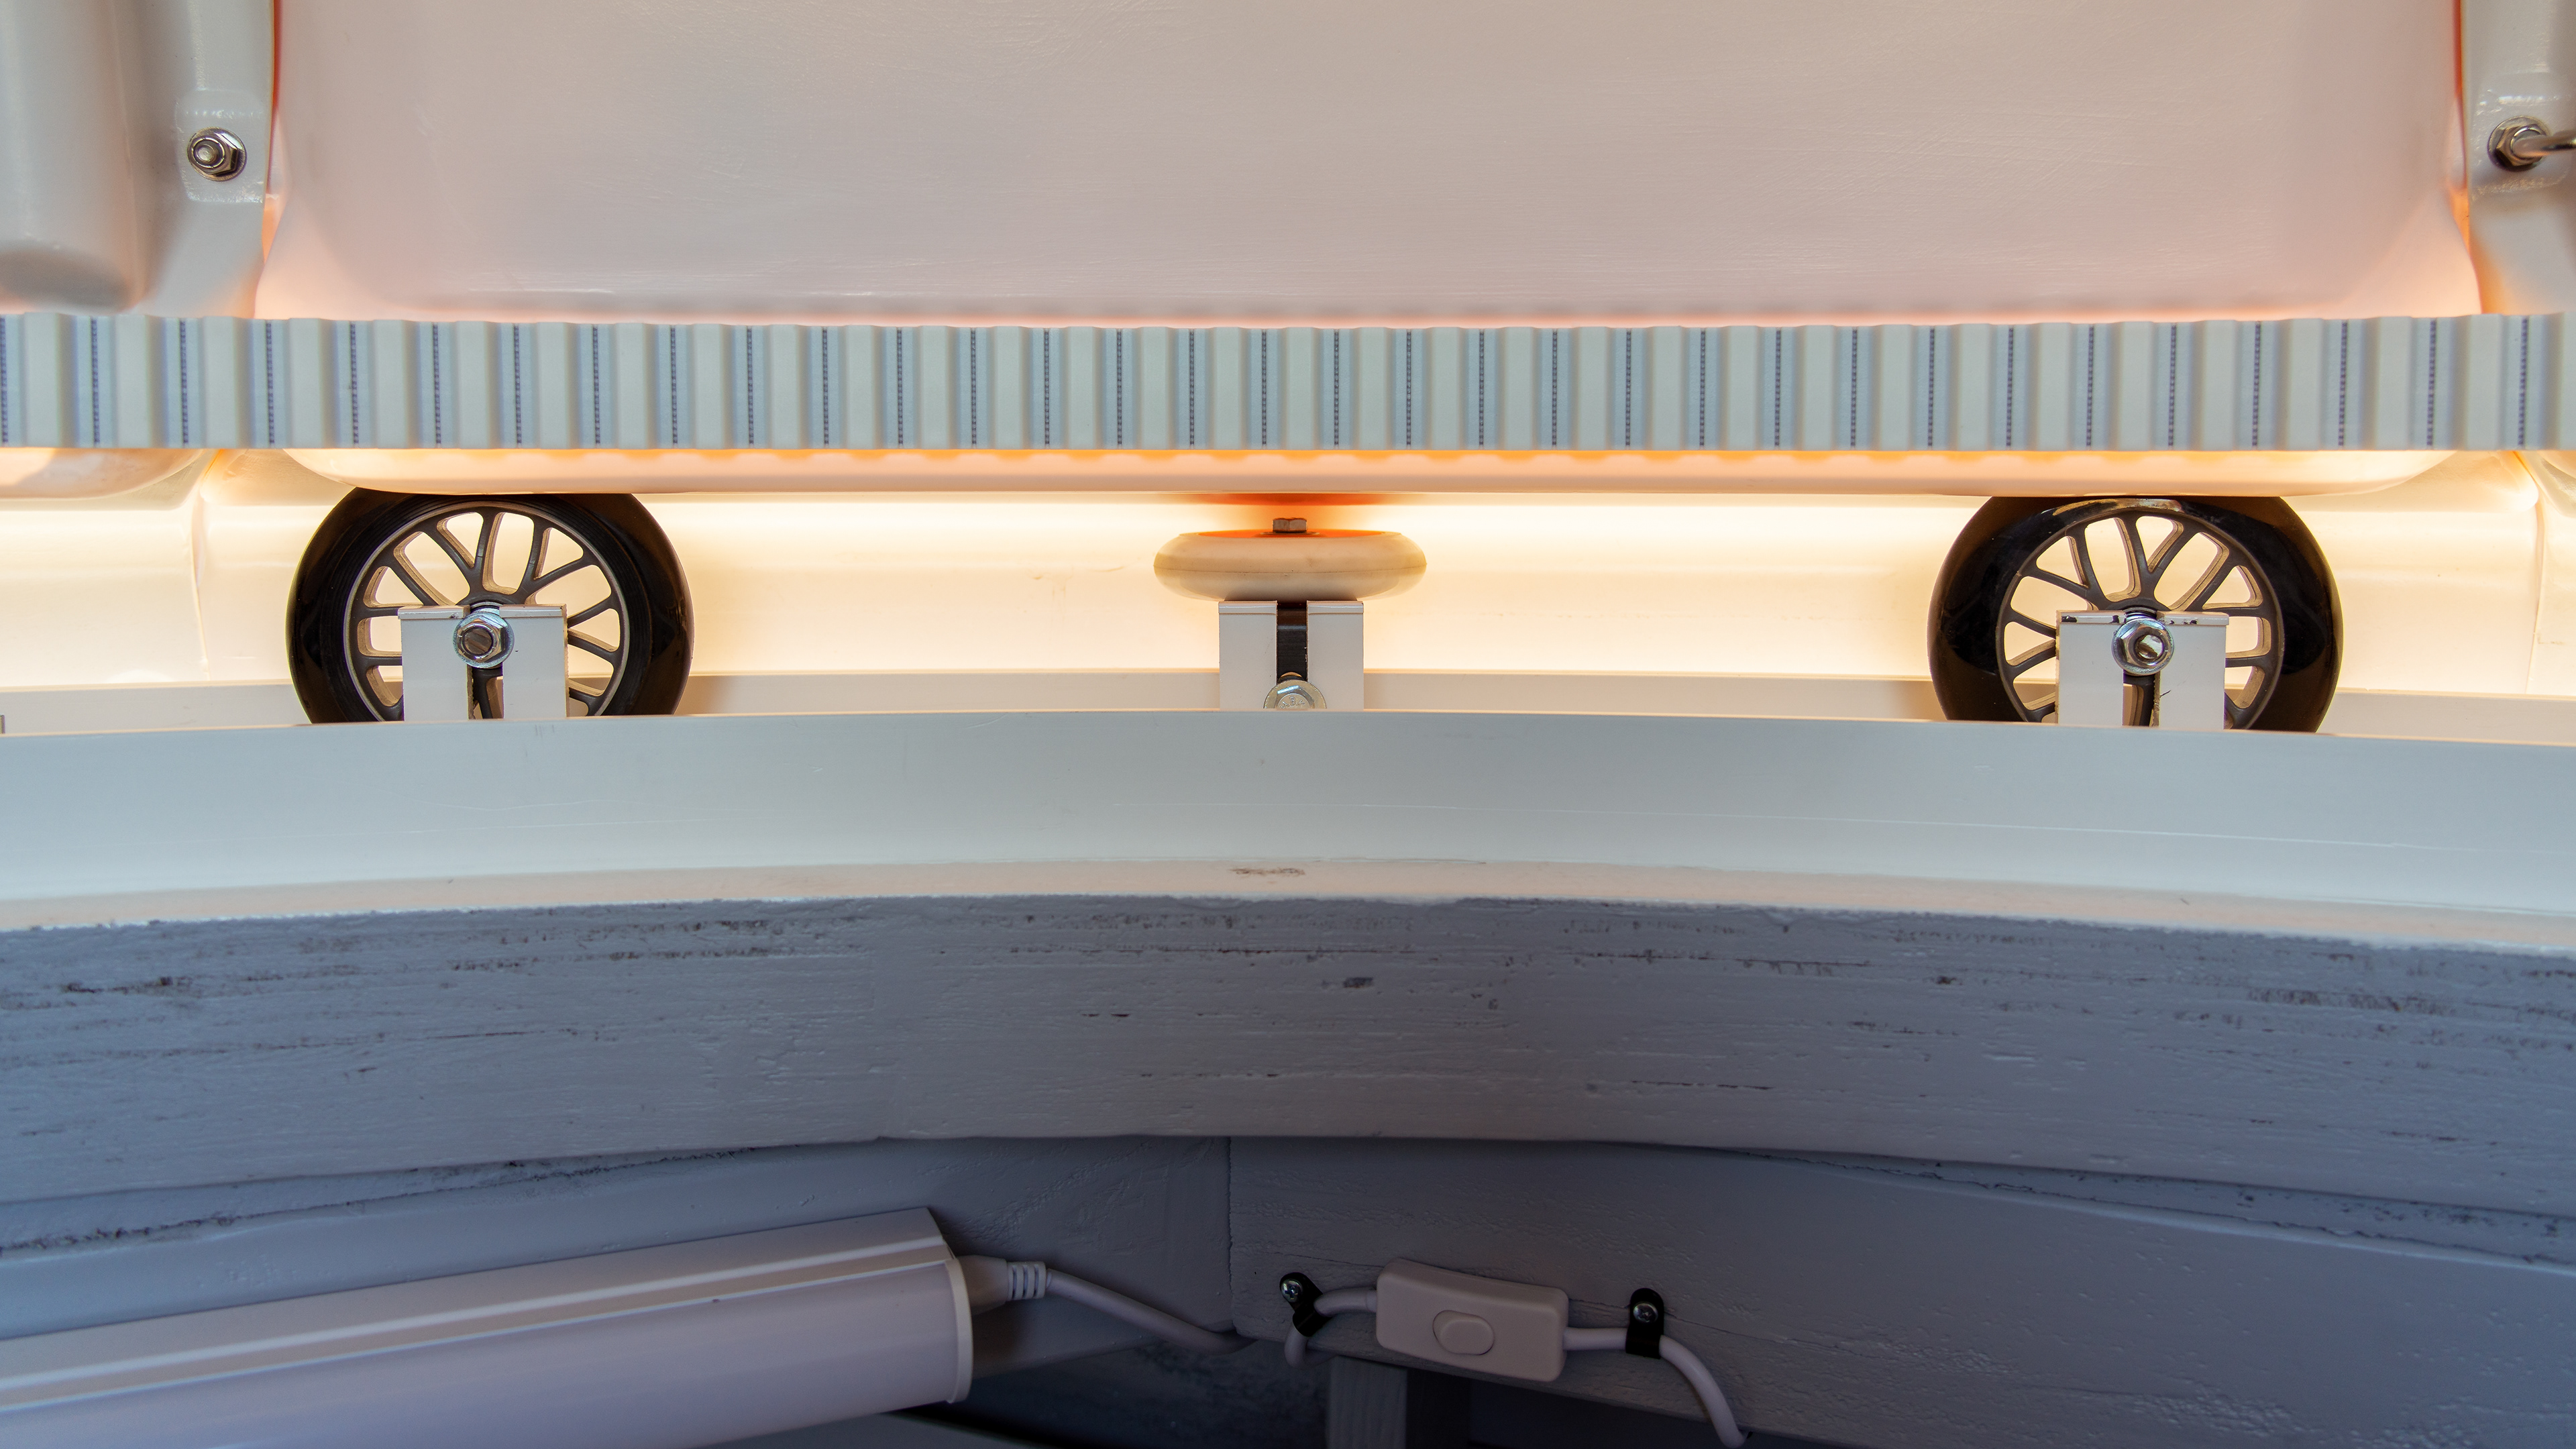
SOLUTION: L-foot, the same one I used to mount the solar panel rails from IronRidge. It's made of aluminum, super strong, and just happens to be the ideal height with ideal cutouts for the hardware. It even has a small lip at the top to prevent incidental slip-out. The PERFECT solution for installing rollers. This little $1.95 bracket solves ALL of the issues outlined above.
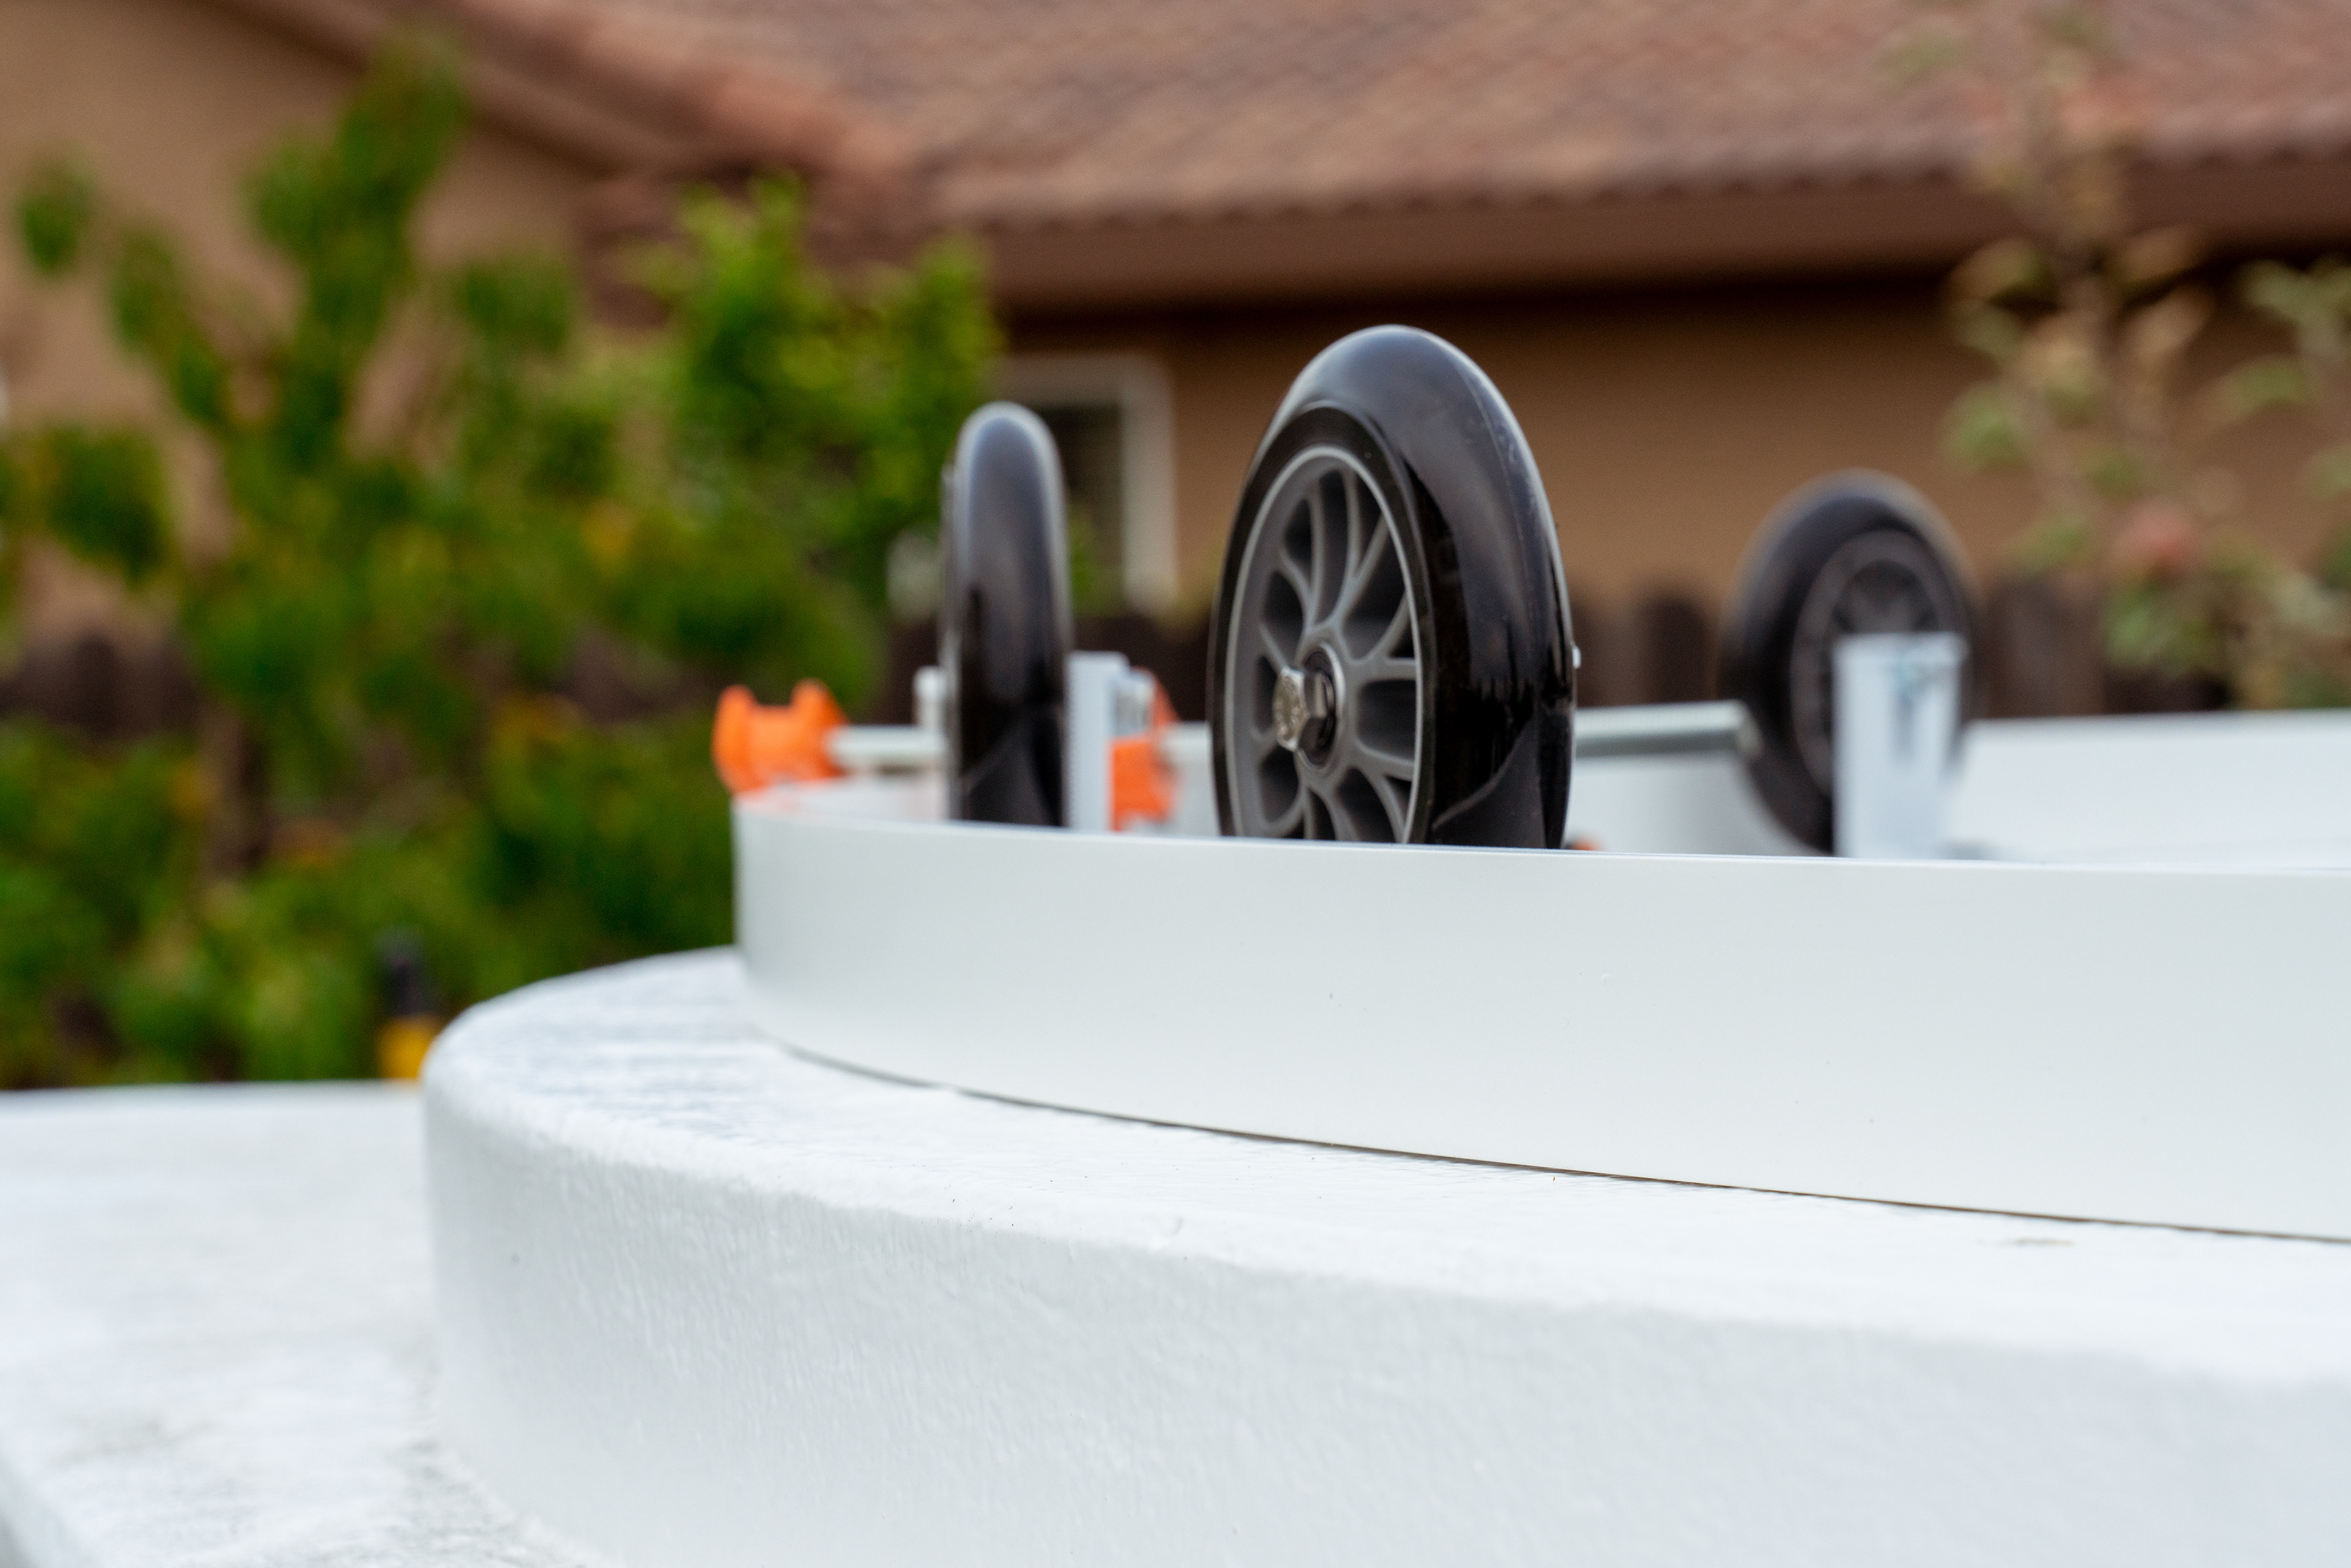
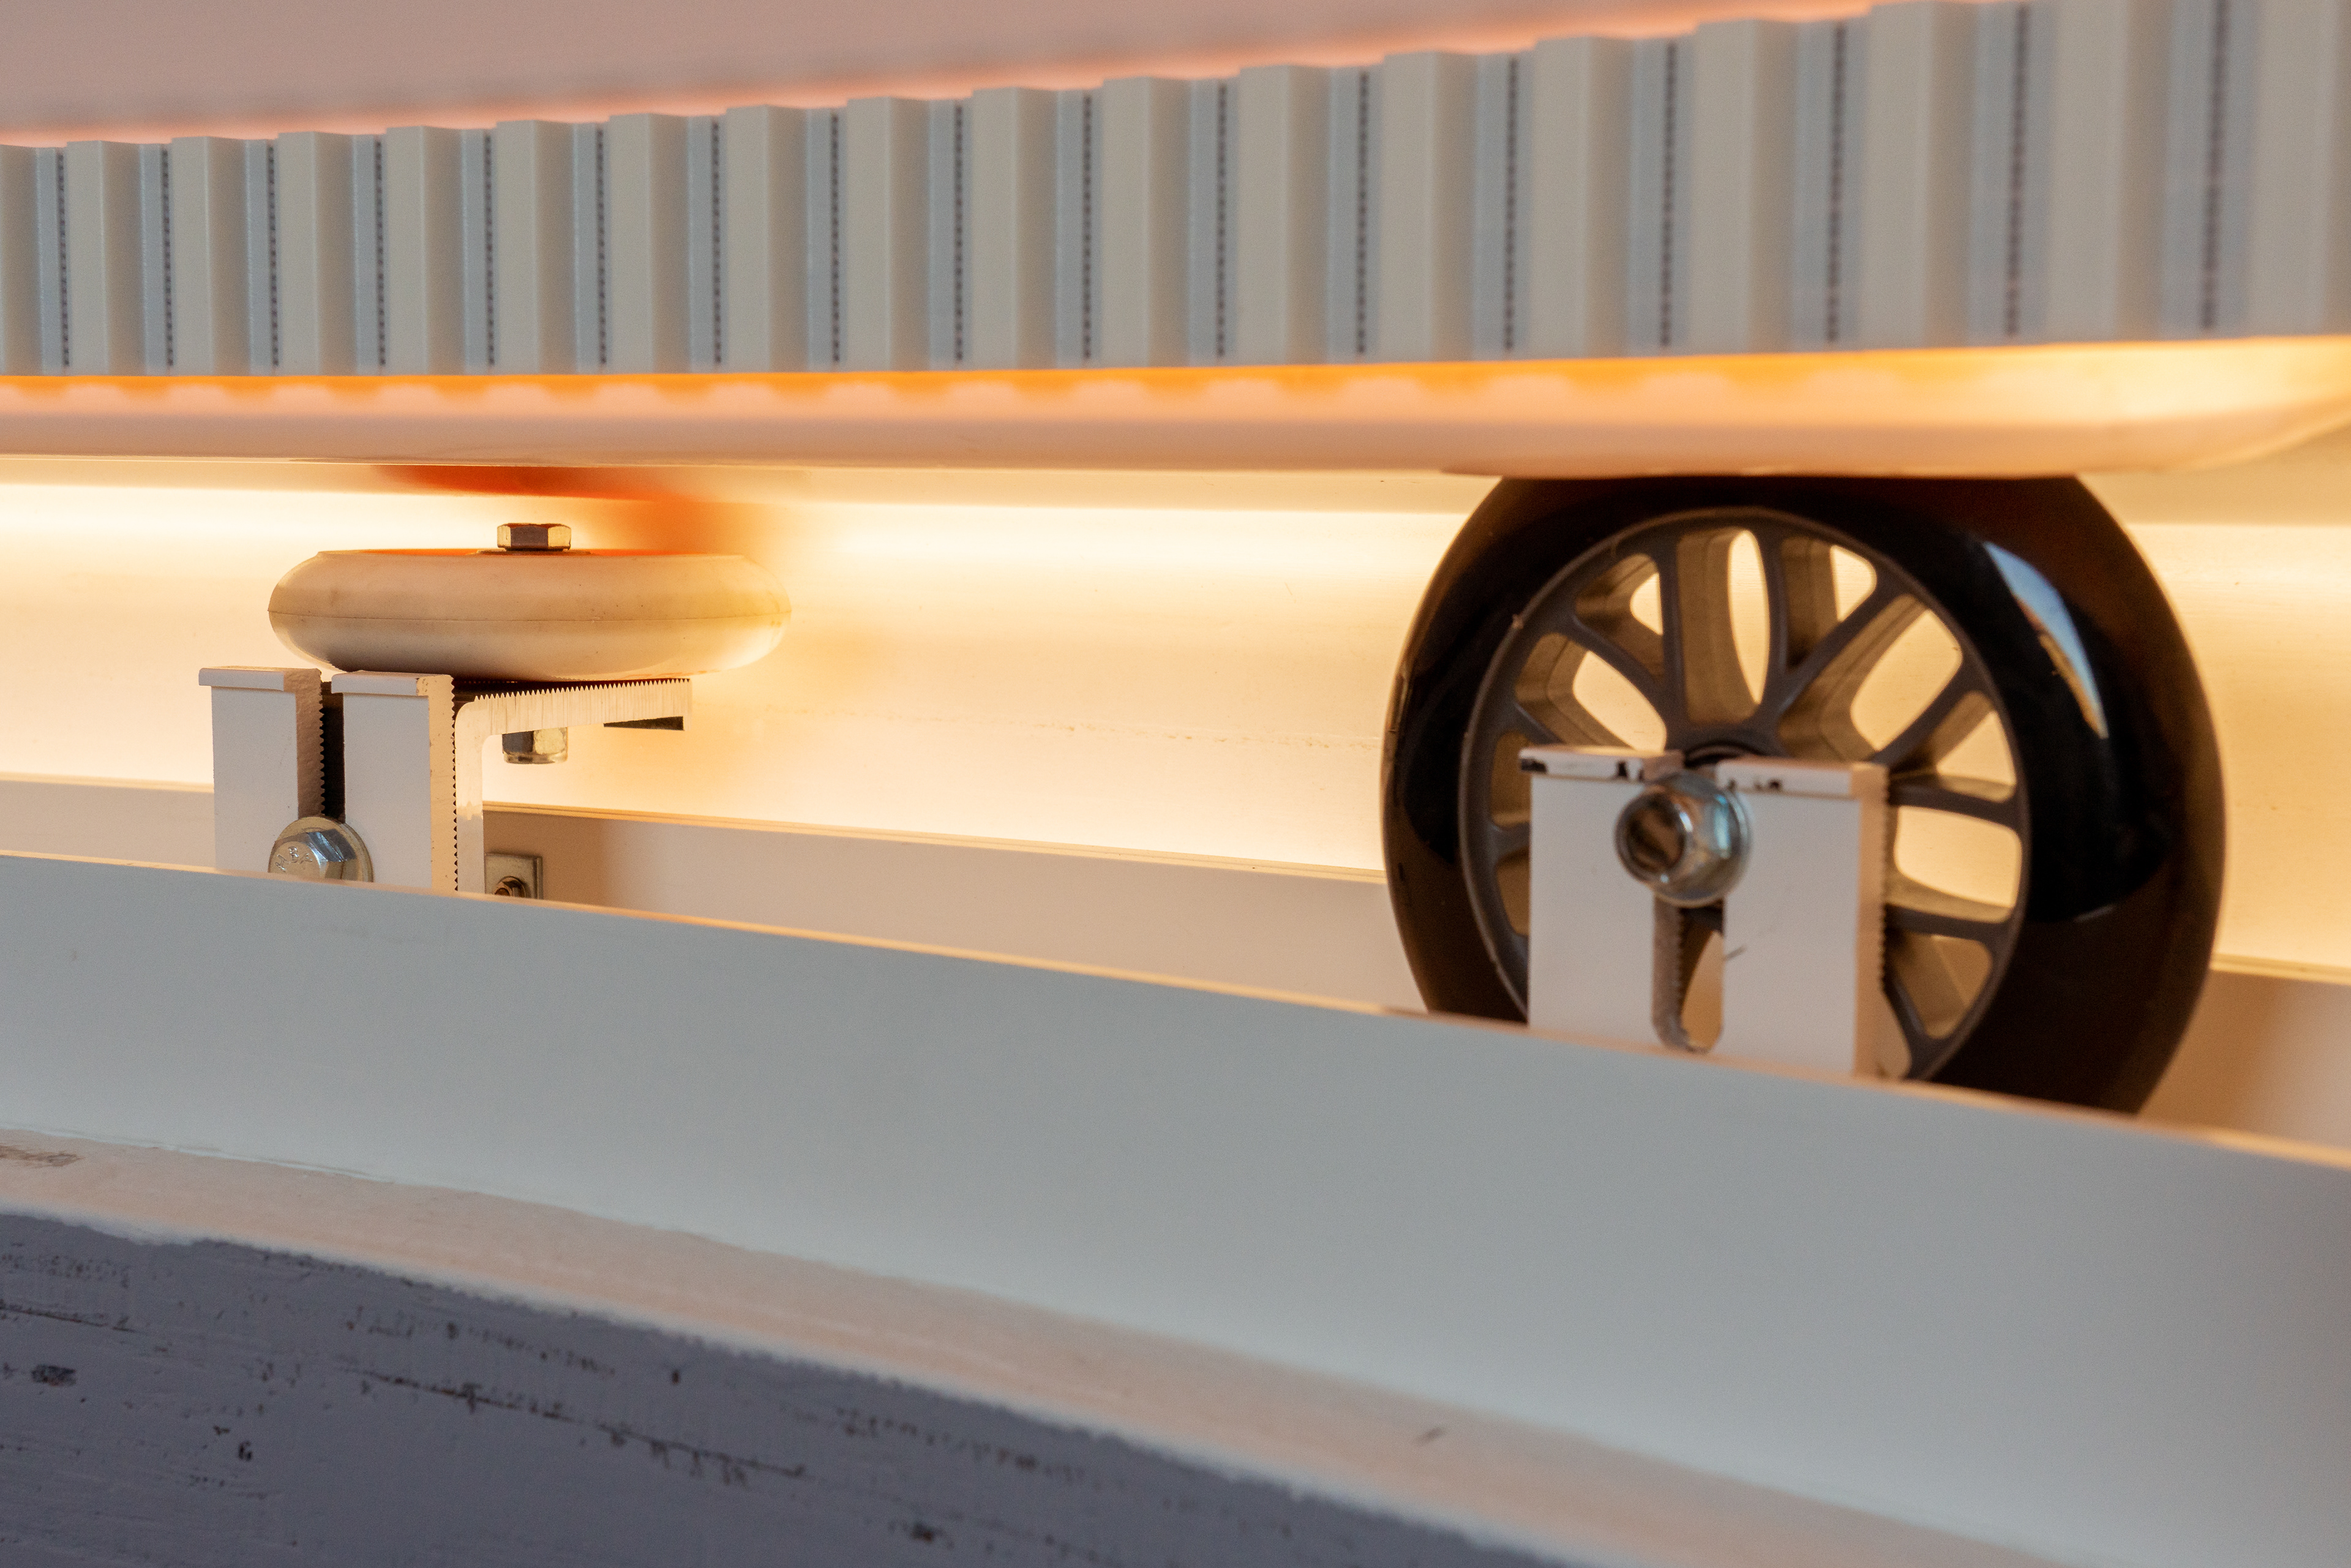
IMPROVEMENT: Larger diameter wheels reduce rolling resistance... I replaced main rollers with a larger ones that have a substantial 125mm diameter. Additionally, I doubled the number or supporting rollers to 16. The combined effect resulted in a MUCH smoother rolling of the dome: no more bumps and more importantly a consistent amount of resistance through the entire 360° of rotation. An added benefit is the rock-solid attachment to the base, no flex whatsoever, and the ability adjust height of individual rollers.
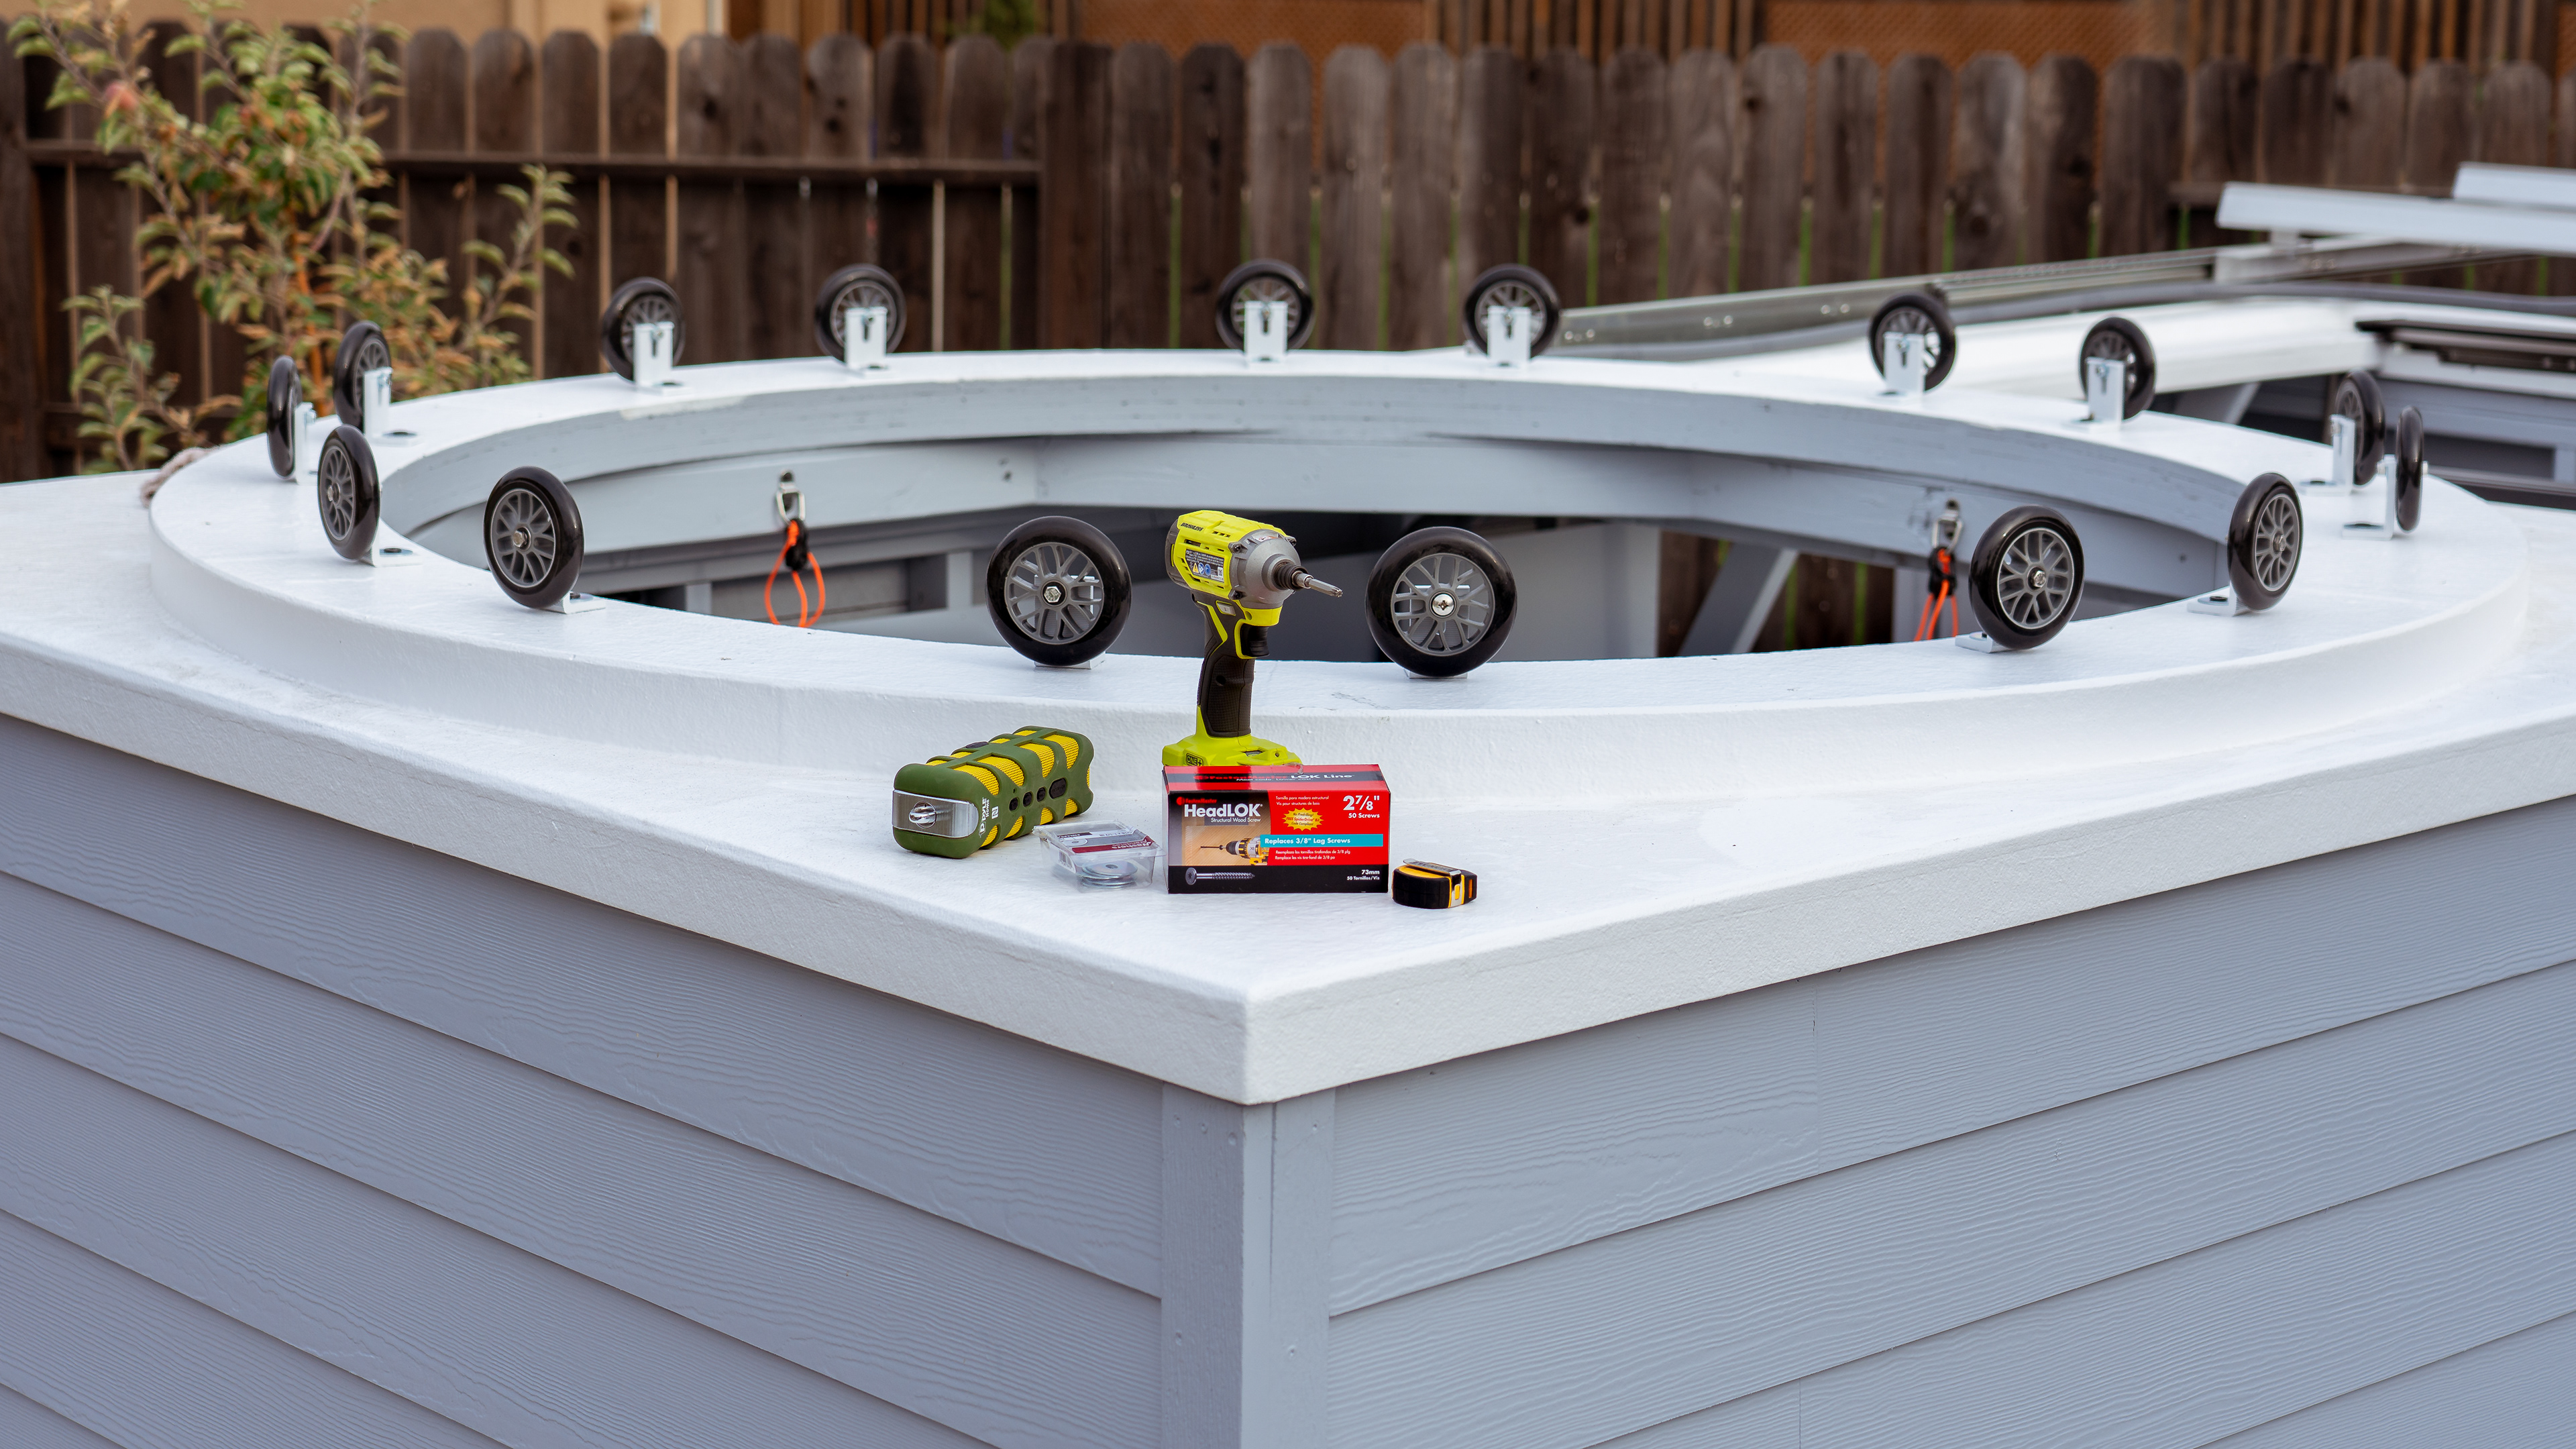
Next, when I combined two L-foot brackets together, I was able to put together a much more reliable attachment for the horizontal rollers that offered all of benefits I listed above with the added lateral adjustability for individual rollers. This horizontal angle of rollers further reduced unnecessary friction/rolling resistance and created a much more secure solution to prevent dome uplift in high winds.
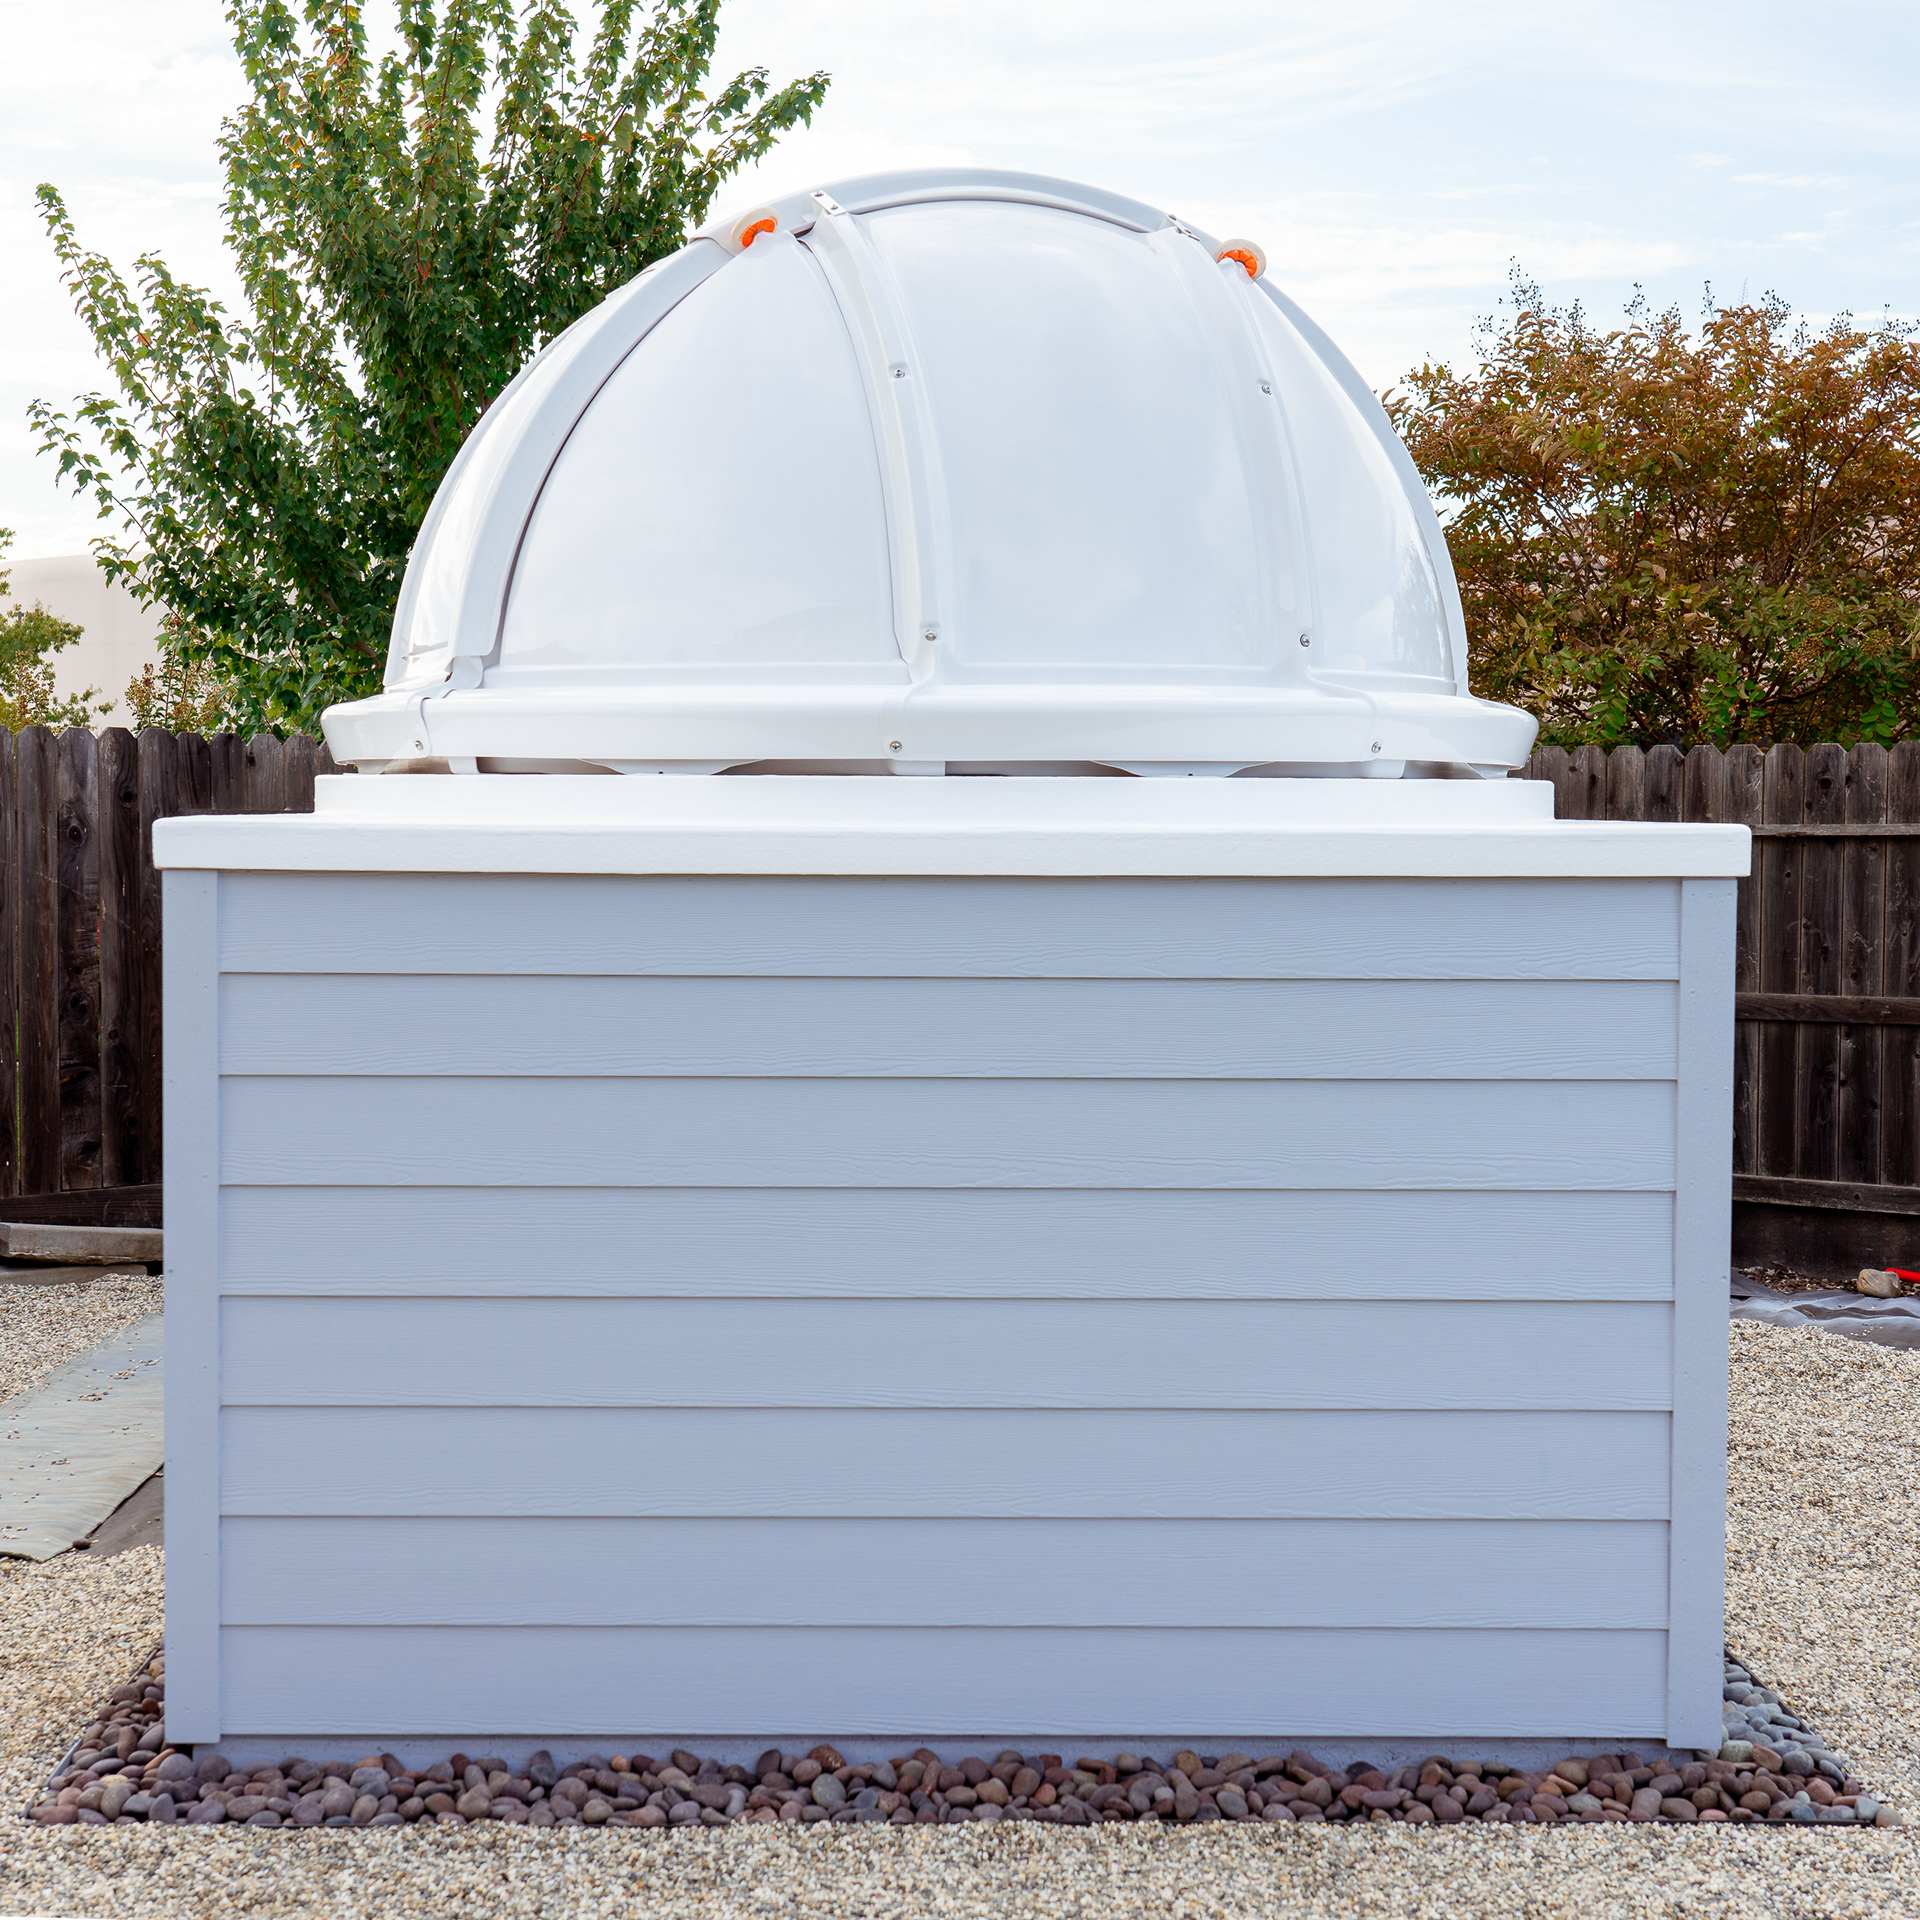
Lastly, the combined effect of using these L-feet together with 125mm rollers lowered the dome down to an ideal height above the base, further reducing any unwanted uplift, closing the weather gap between the base and the dome, and creating a much cleaner overall look for the entire setup.
L-feet perfectly spaced and bolted down with heavy duty hardware
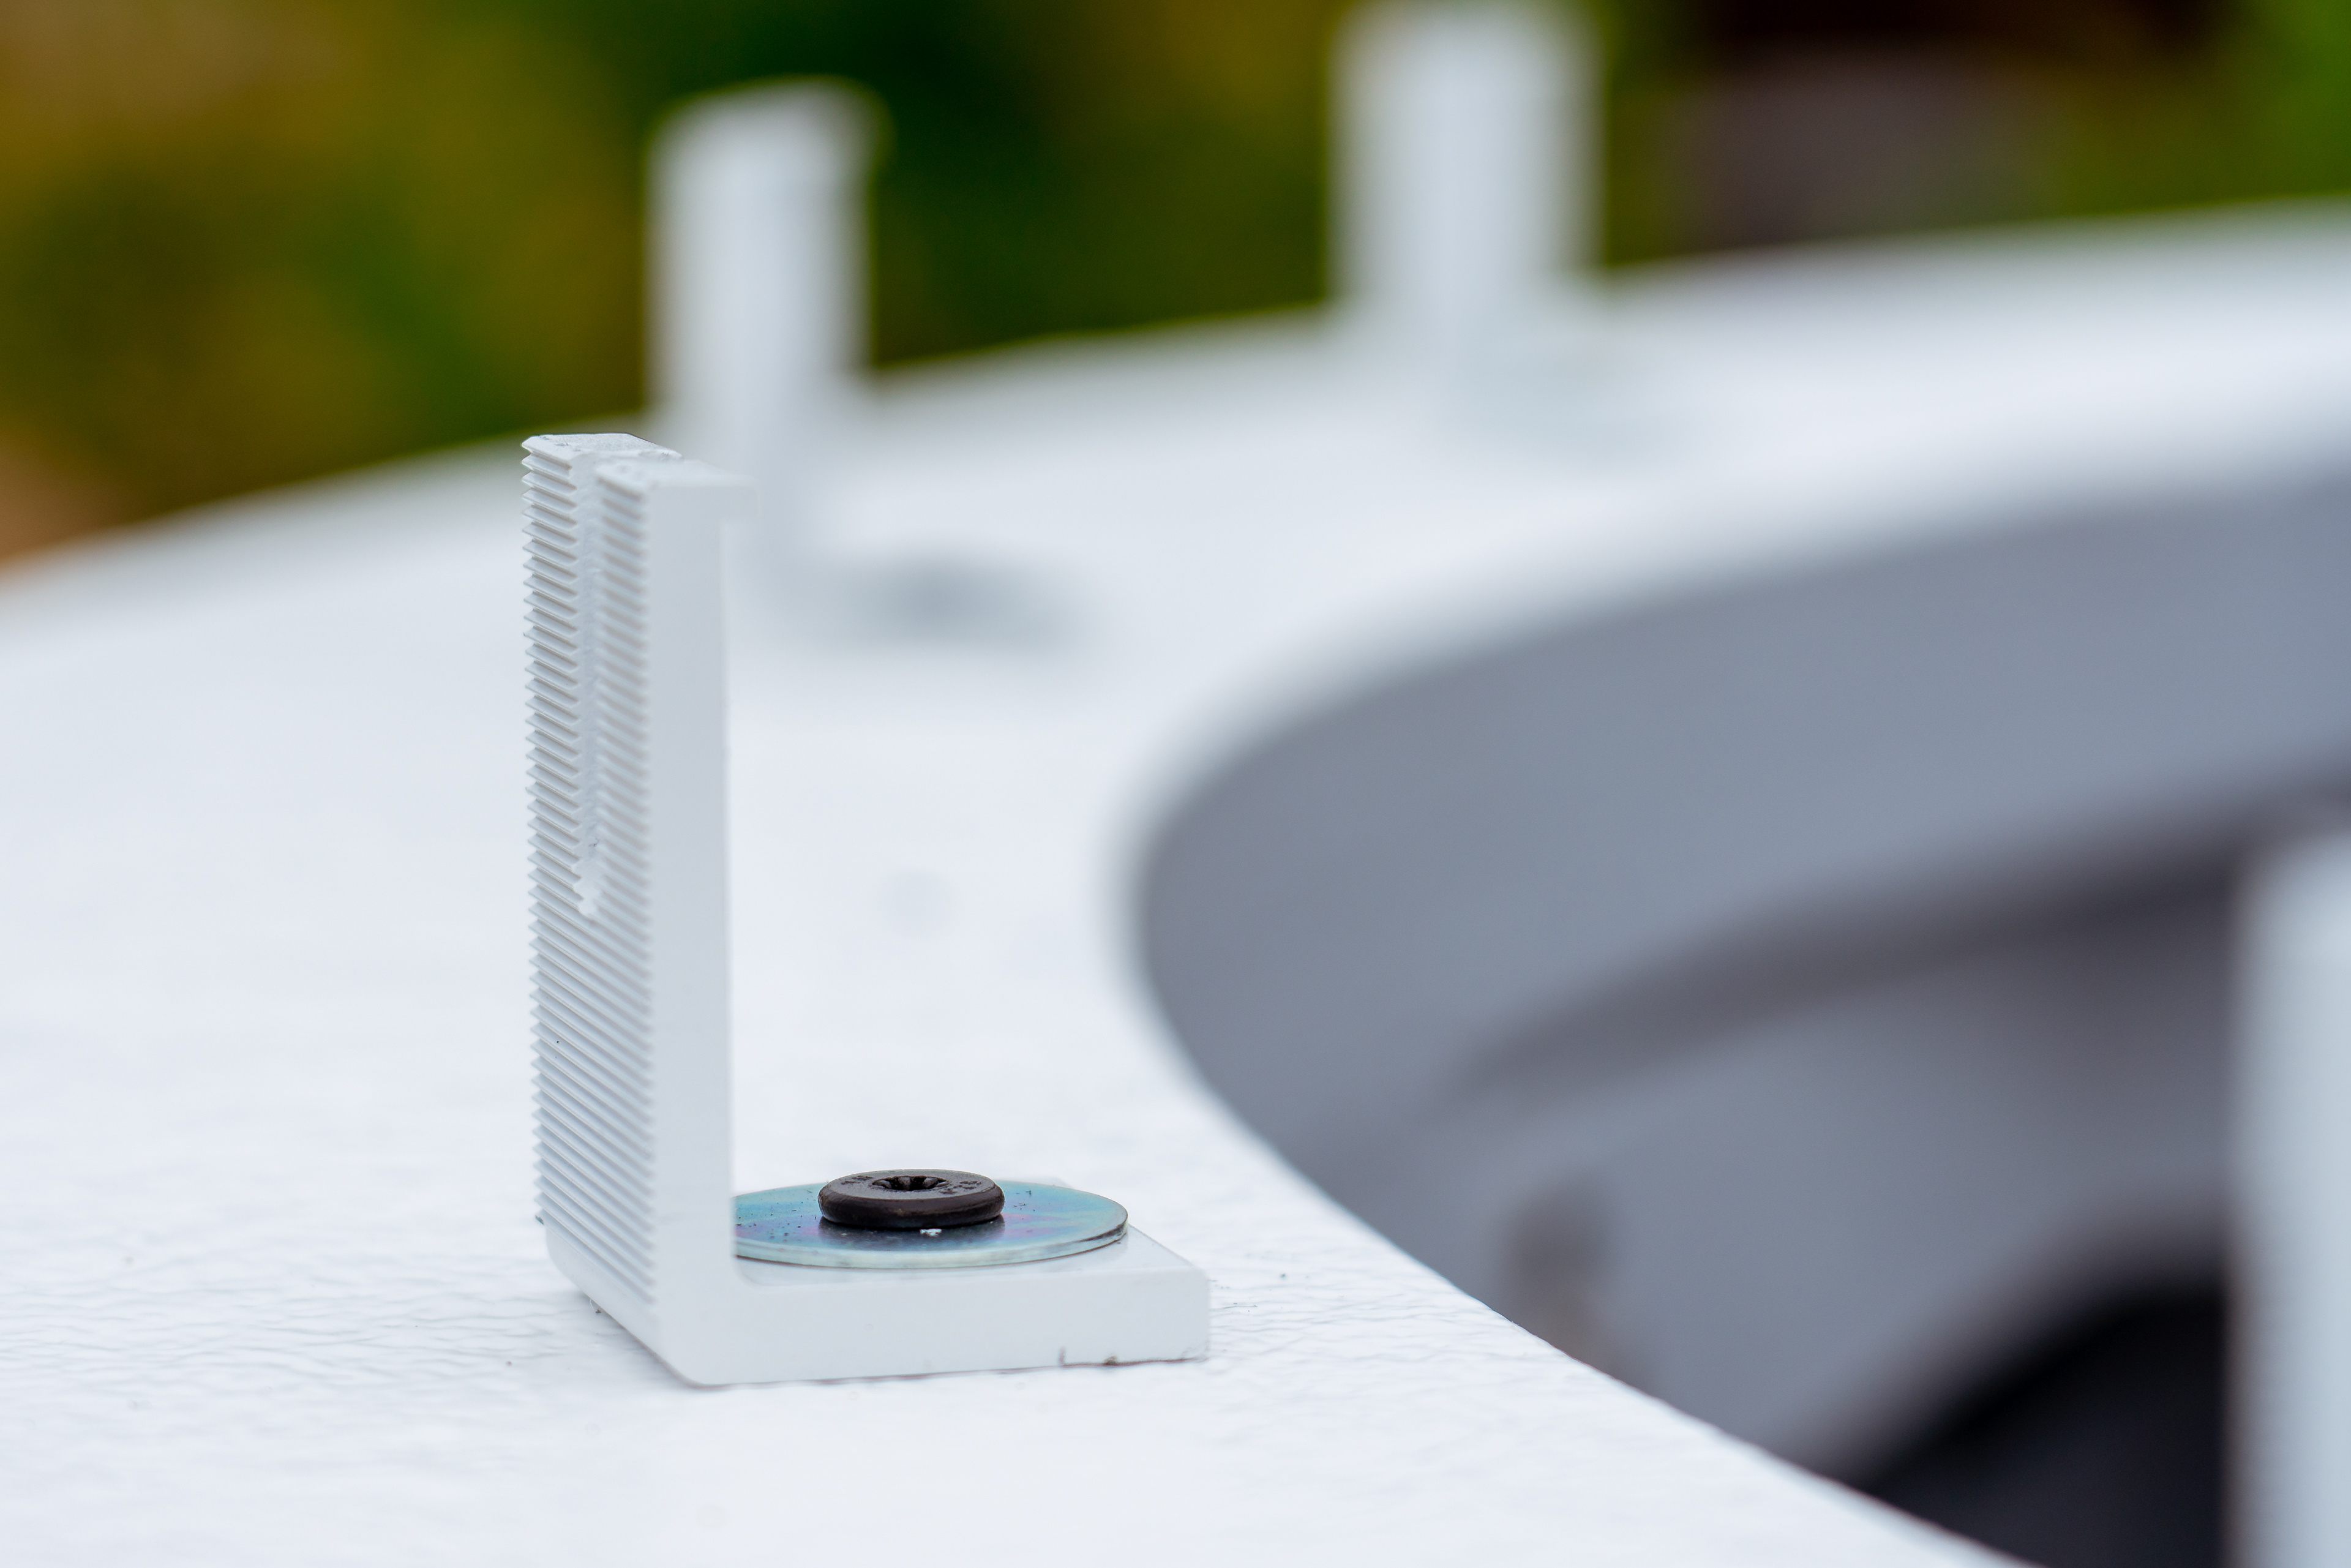
These L-feet are very versatile
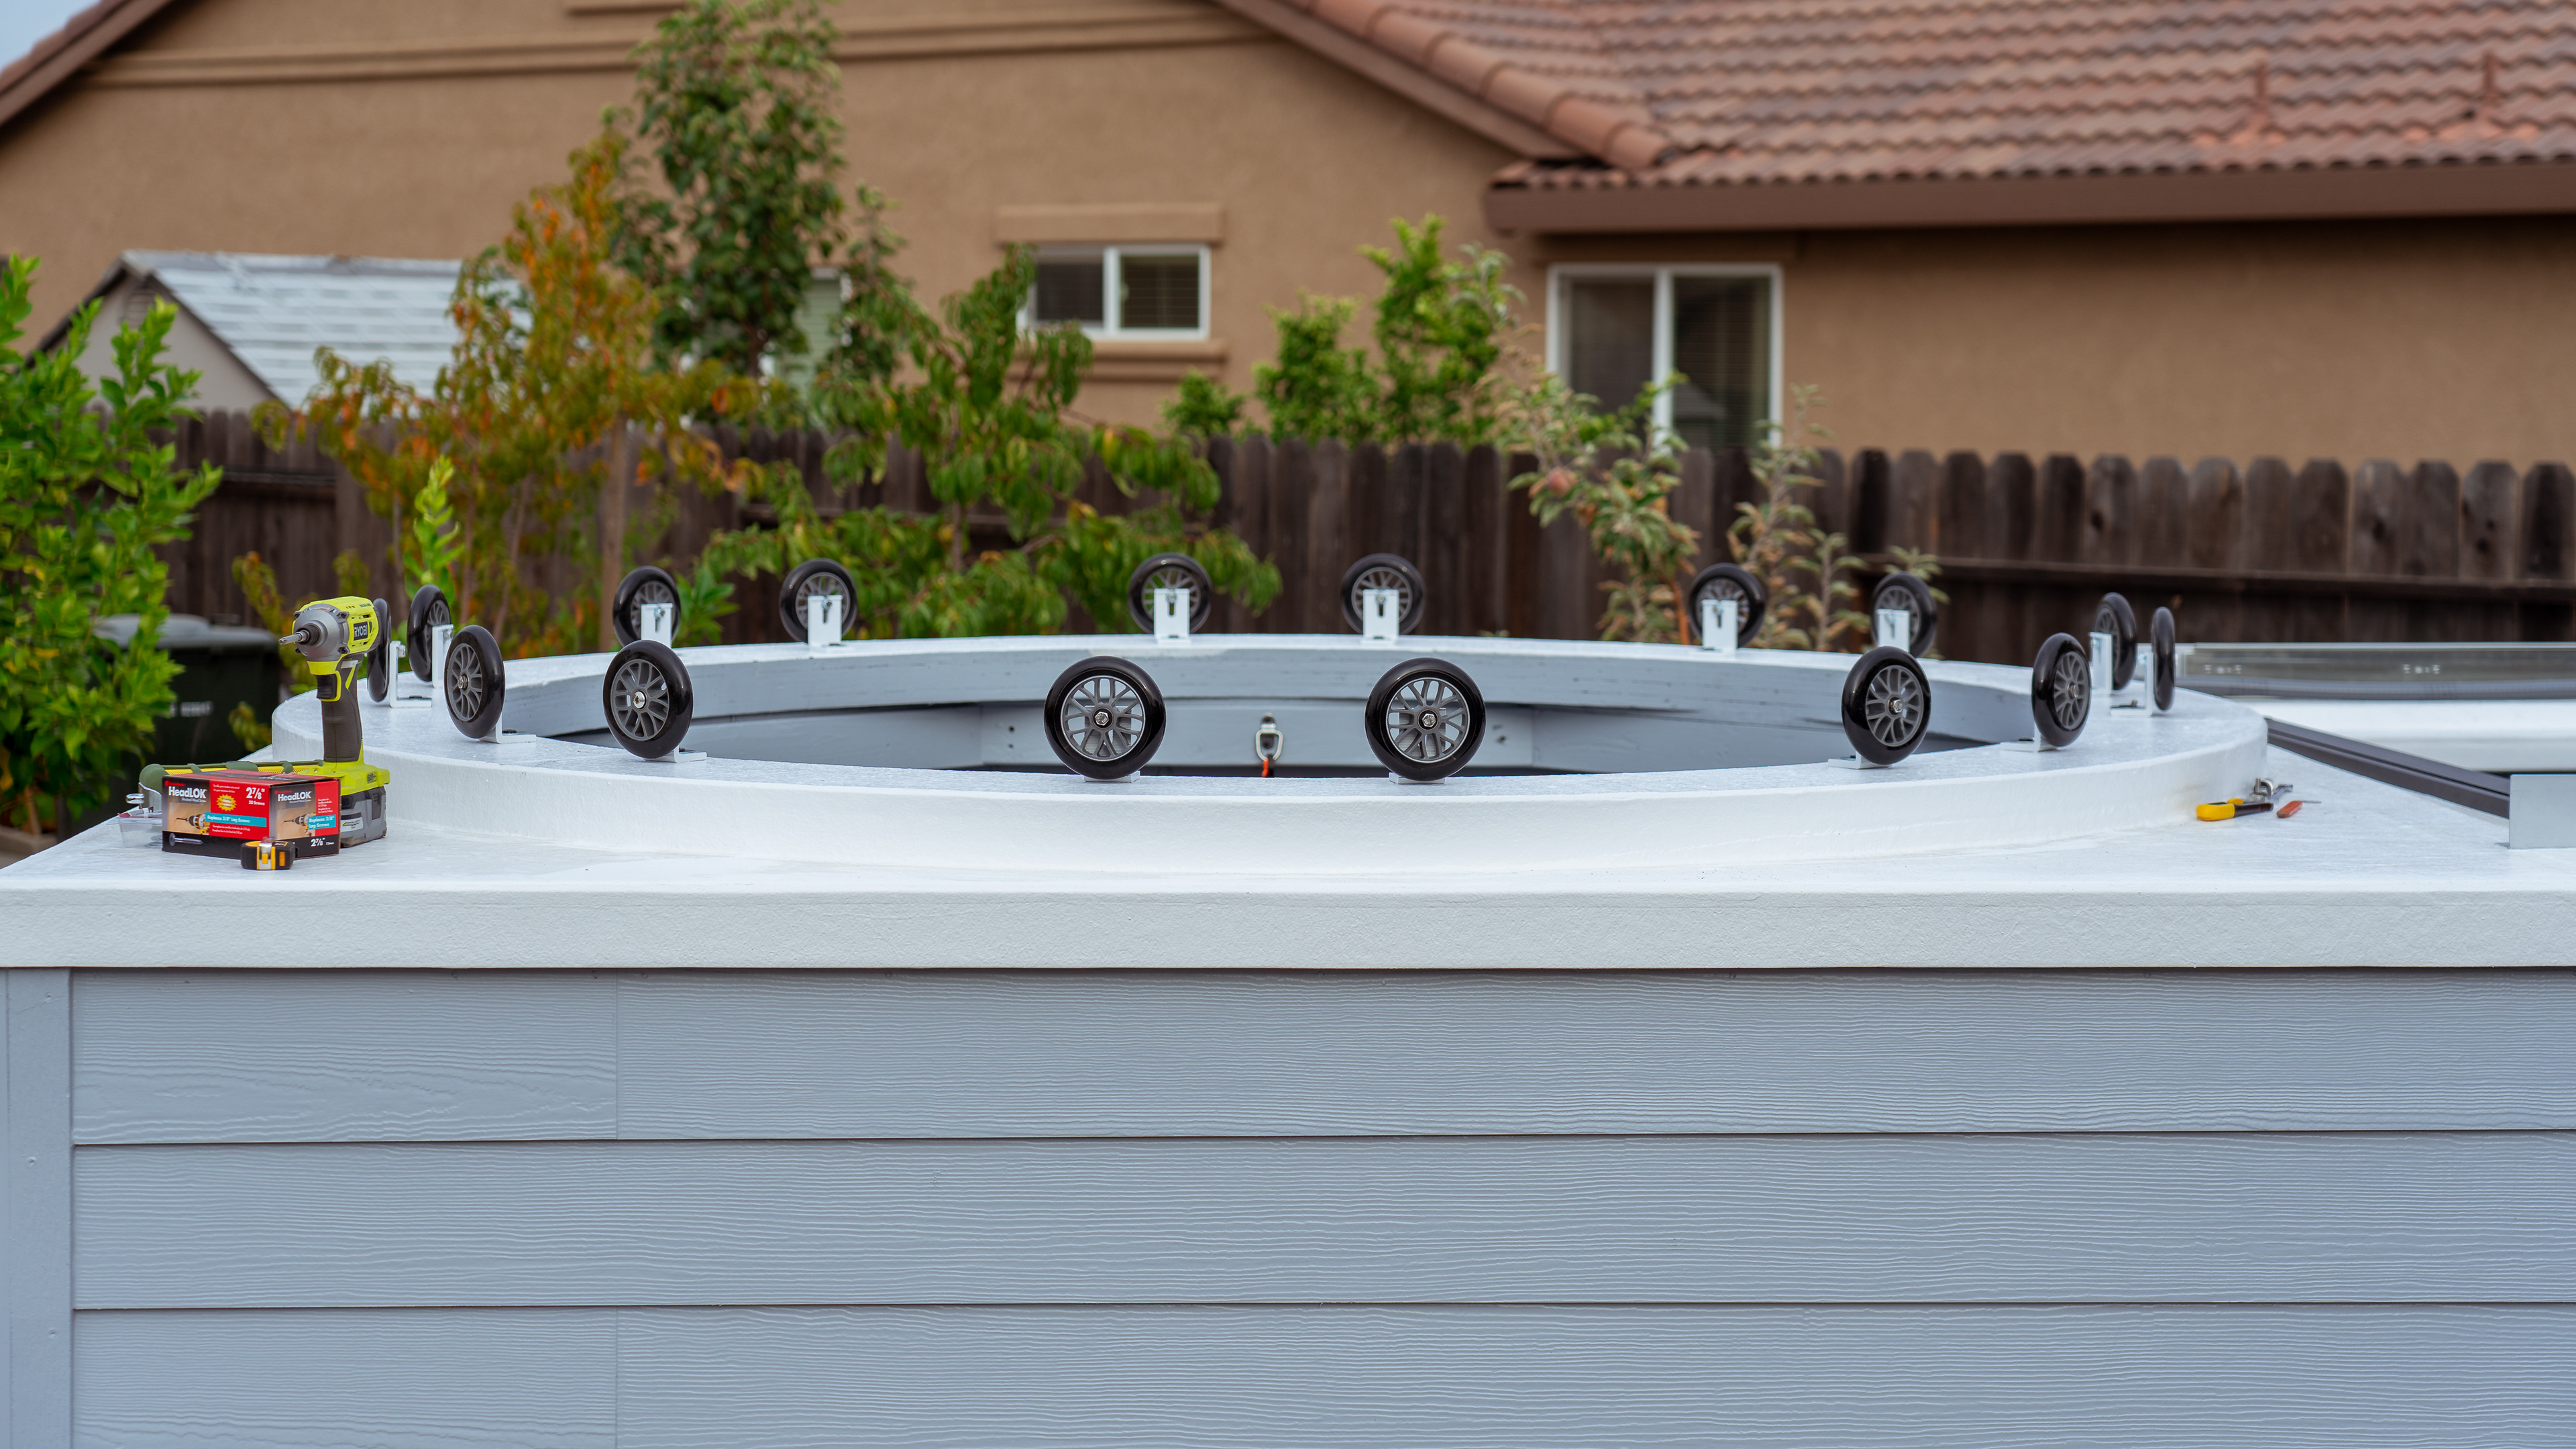
125mm rollers are really nice!
Simple installation and very rigid
"MIND THE GAP"...
This was a real head-scratcher for me: how in the world did this pass any design QA/testing protocols? The fatal flaw of this inherently strange contraption is so obvious that I'm surprised more people haven't complained about it. These gaps are so large and so numerous (same at each section) that any weather elements (dust, water, snow) are free to enter the interior of the observatory at will. Not to mention bugs and any other small critters.
Why complicate something that should be simple?
No reason to have dome sit so high
WEATHER BARRIER...
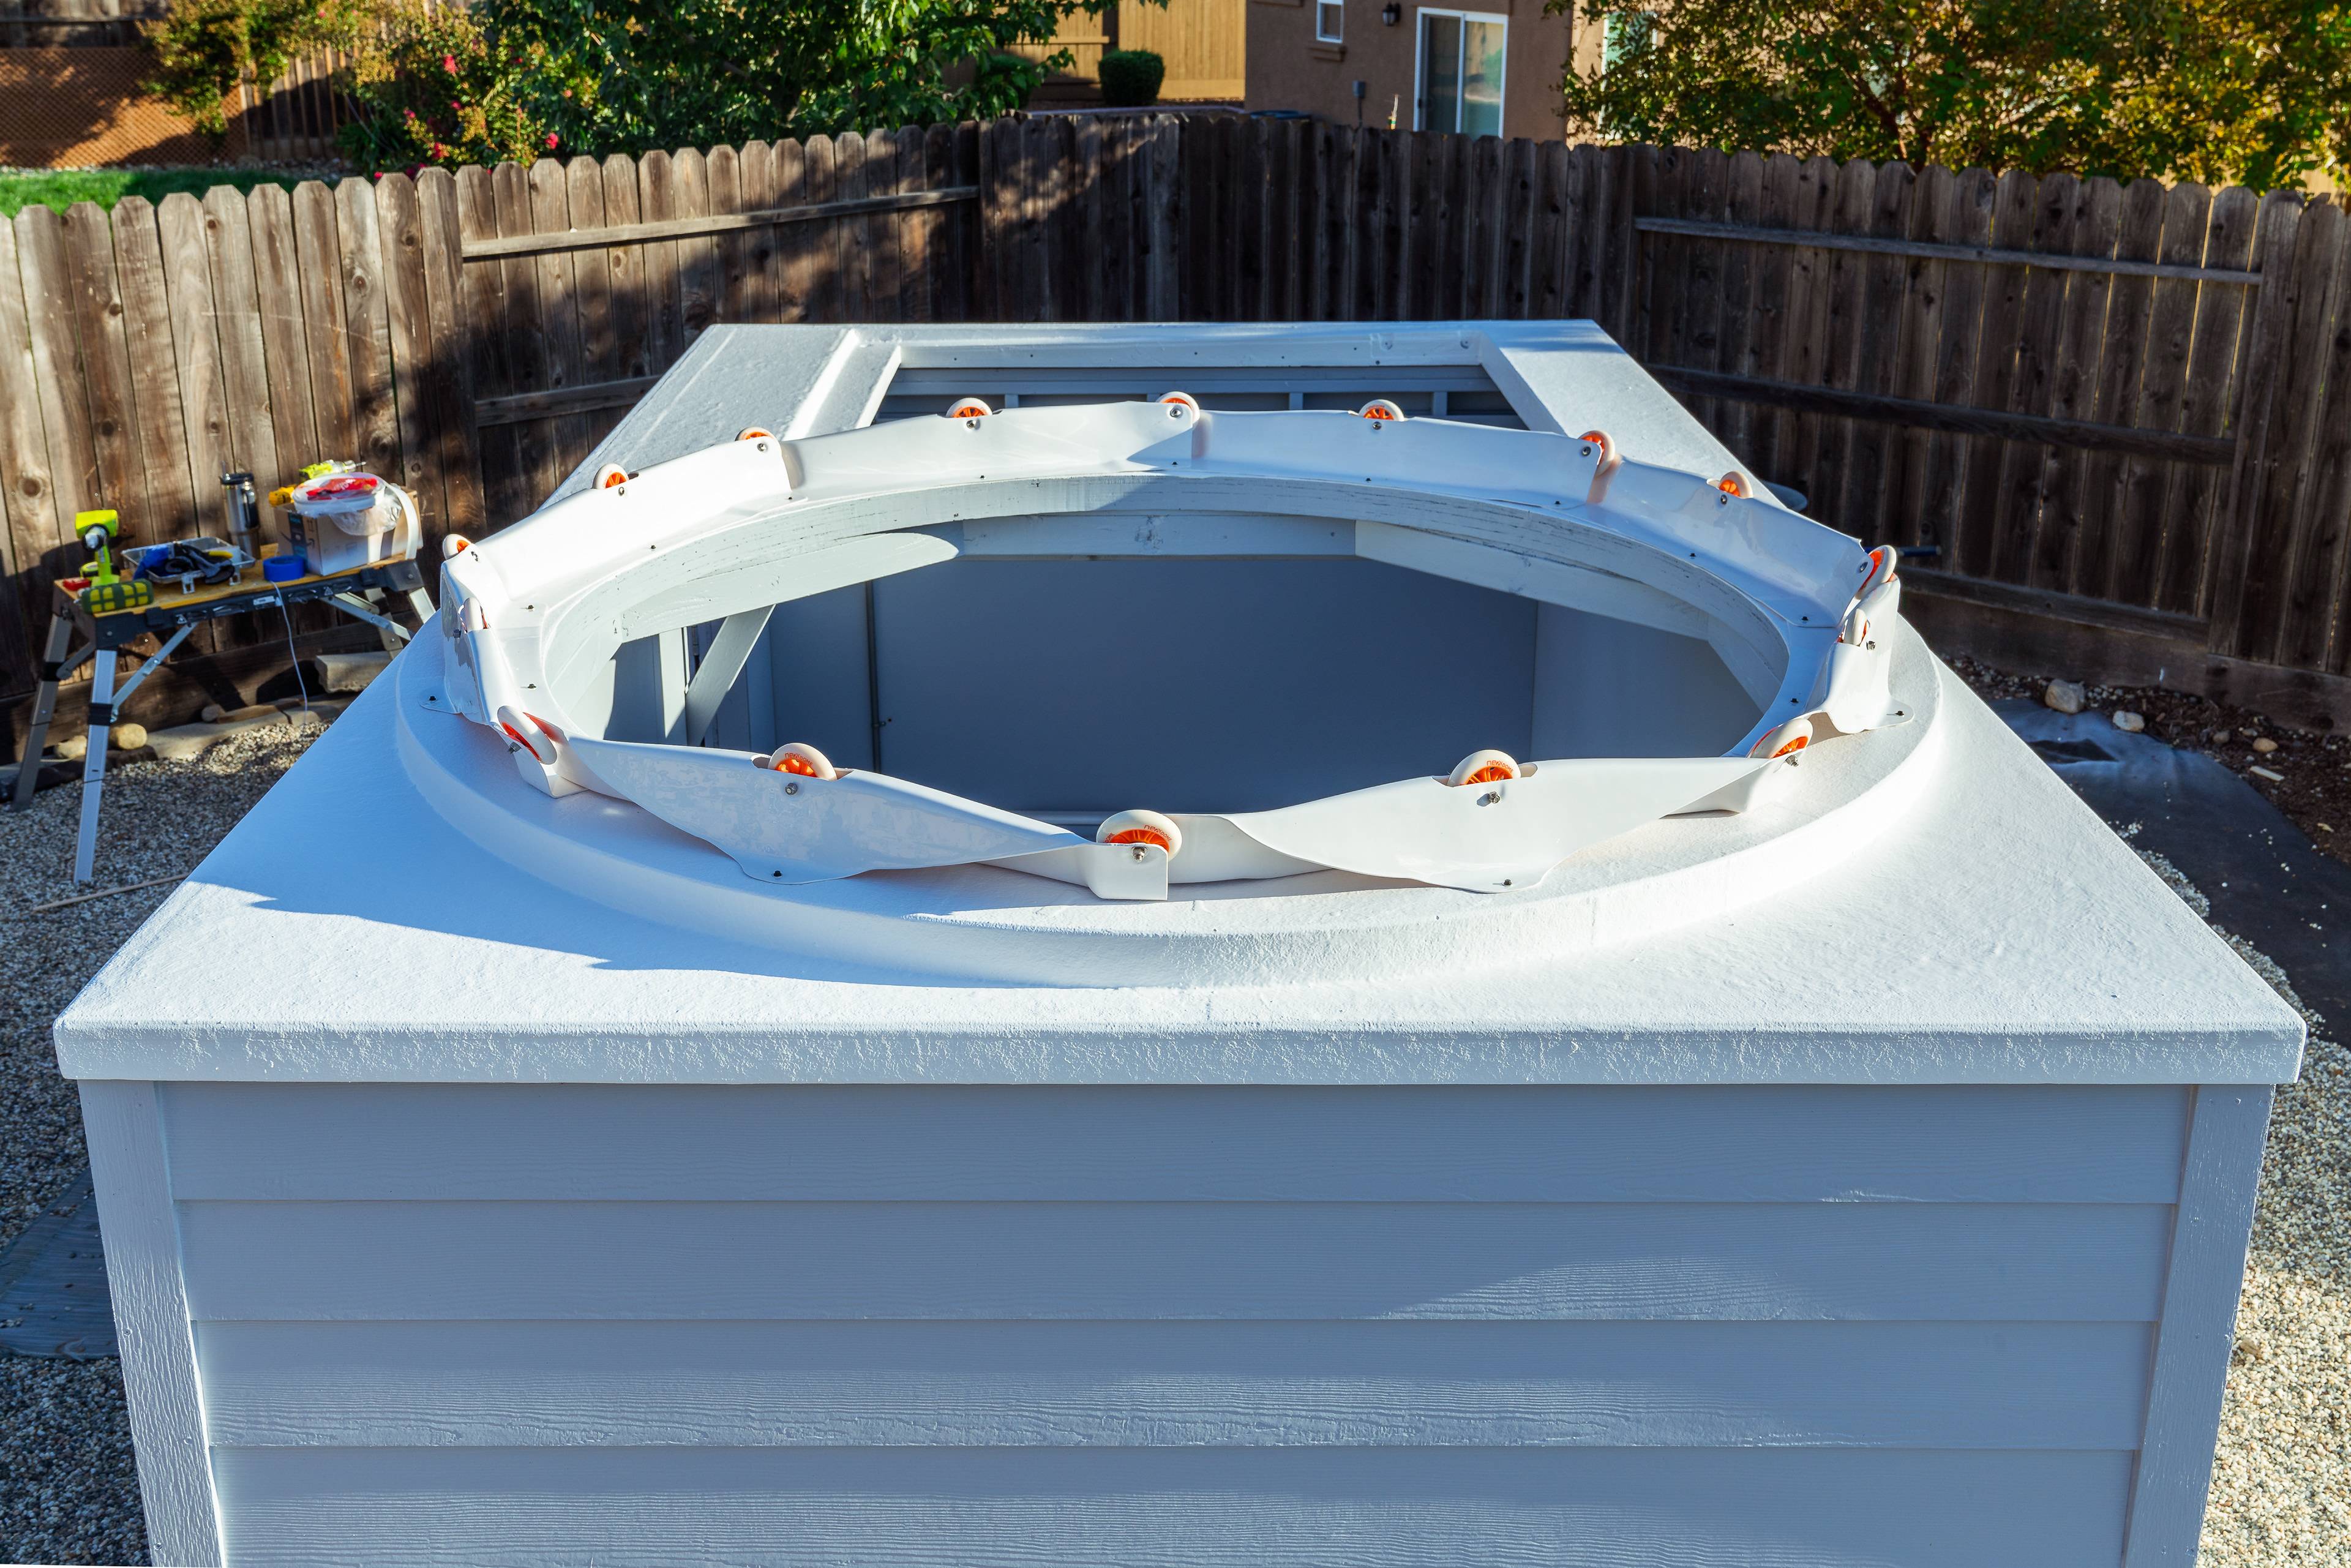
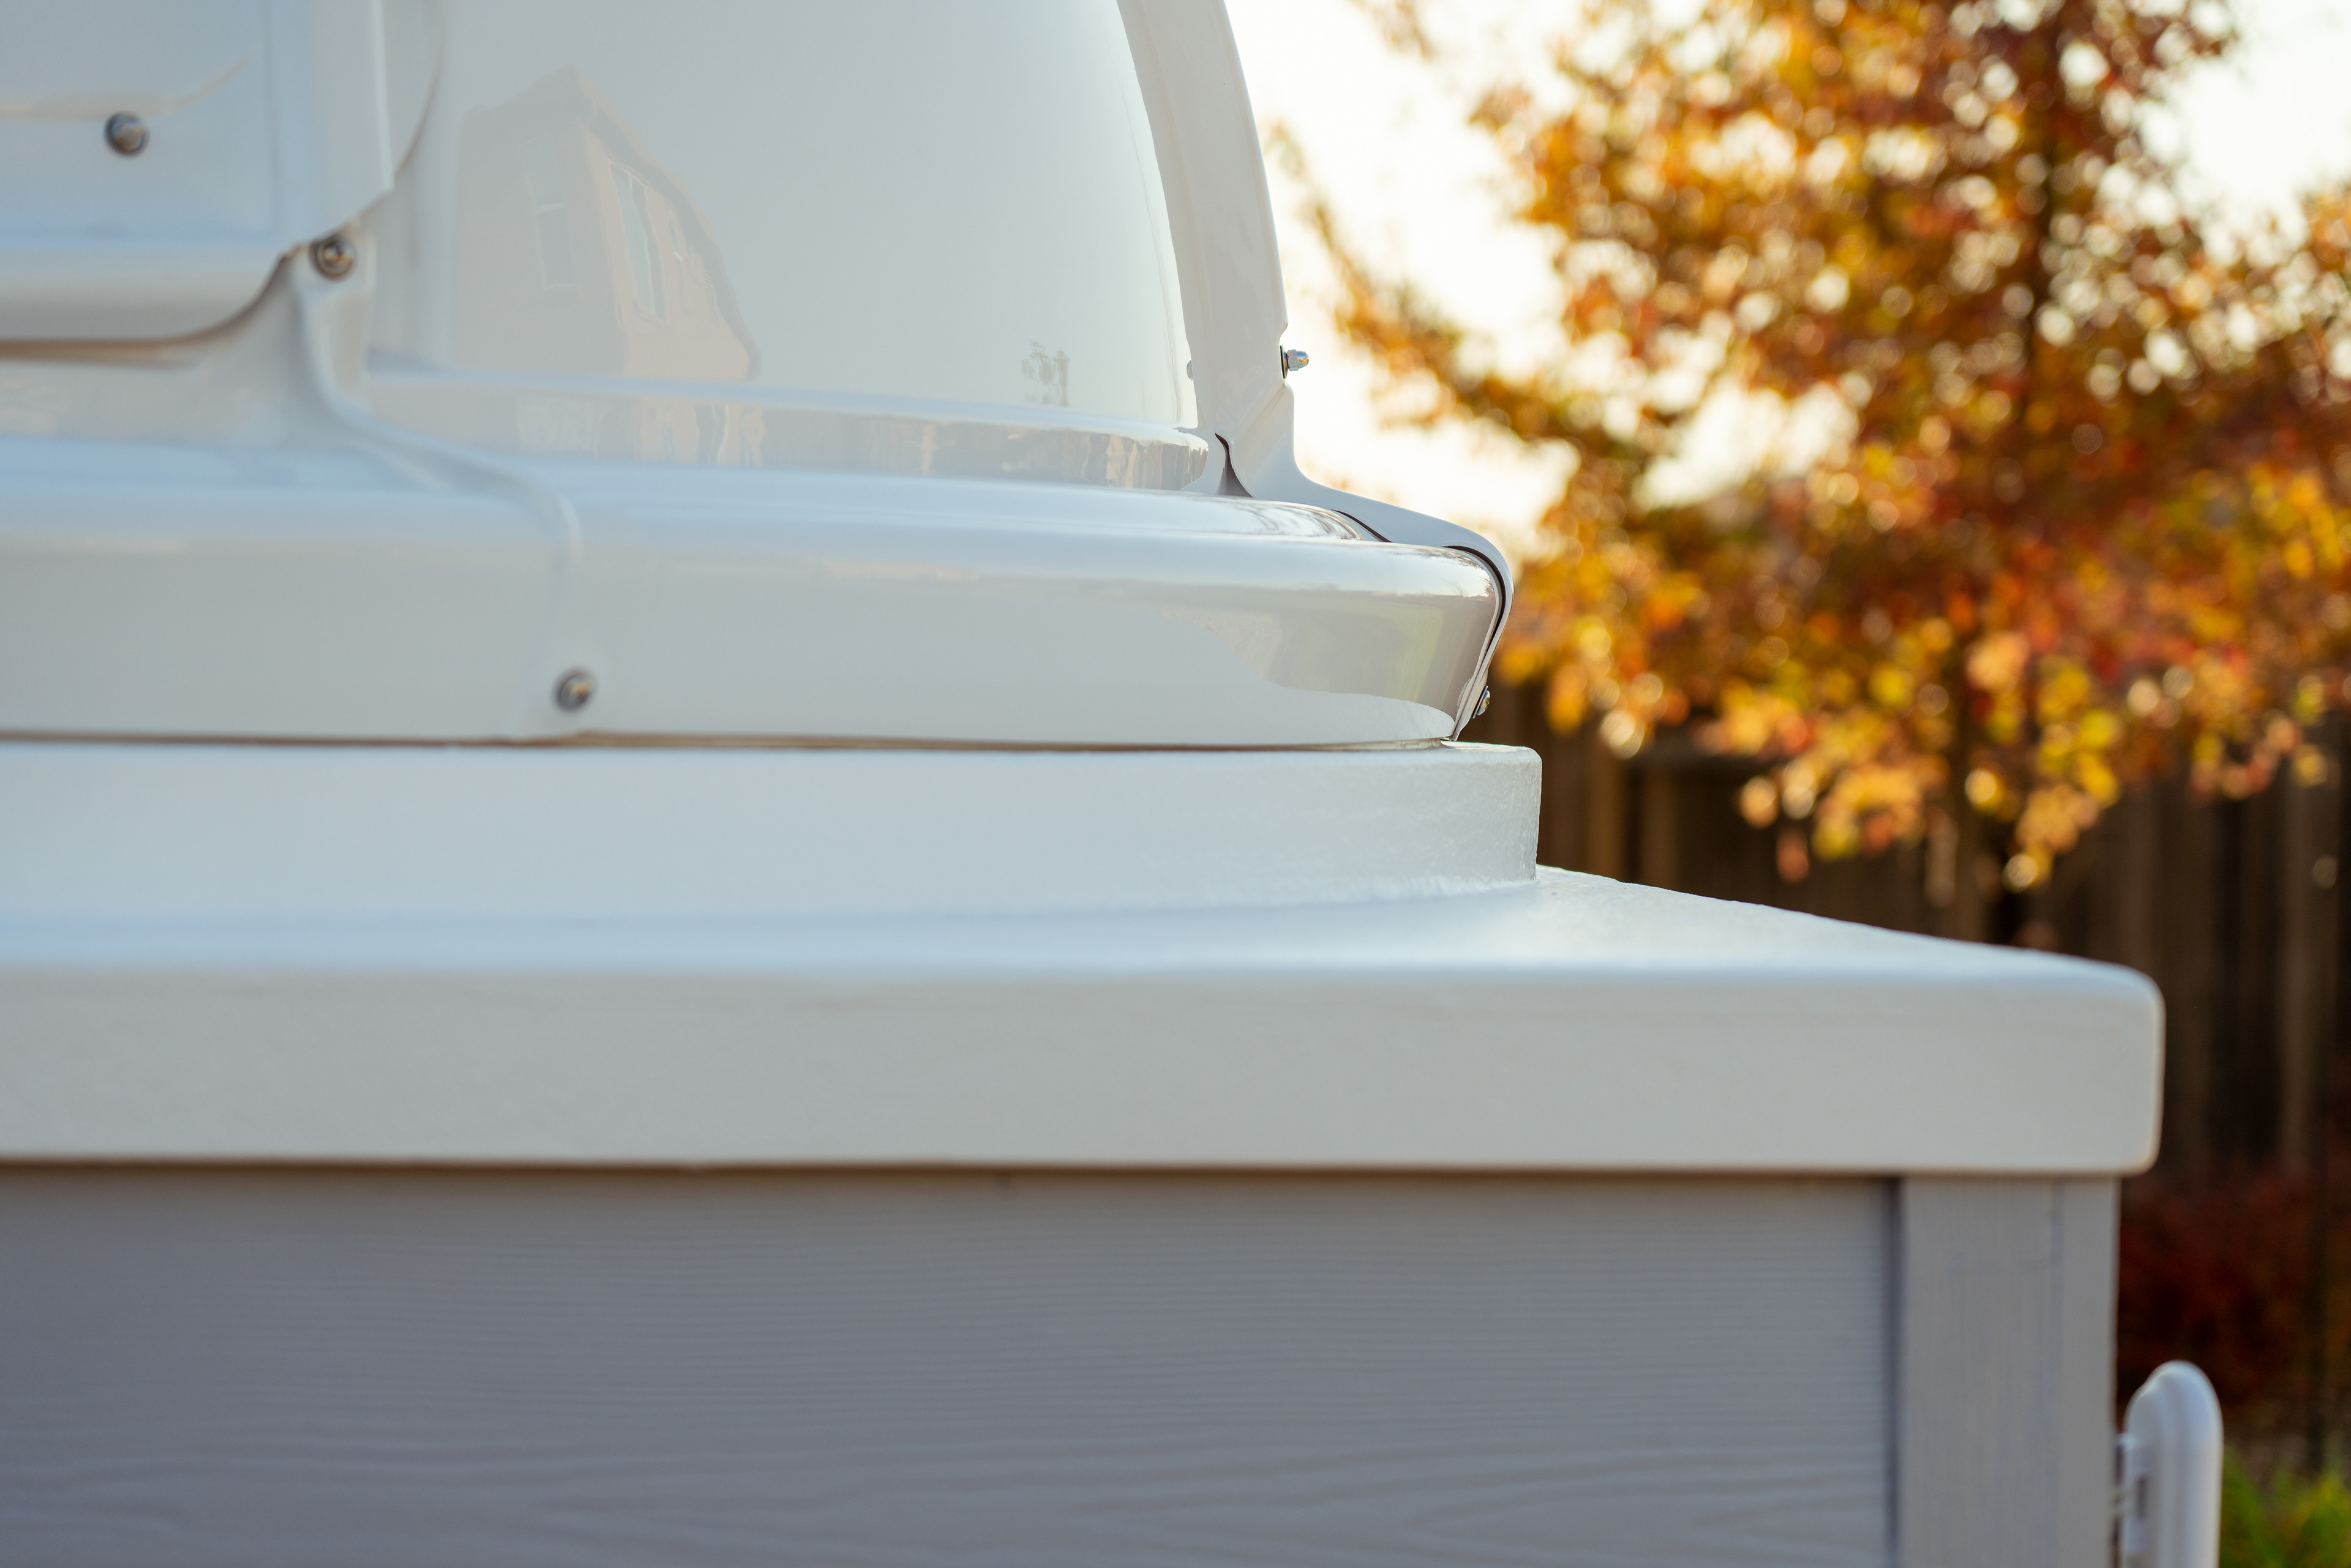
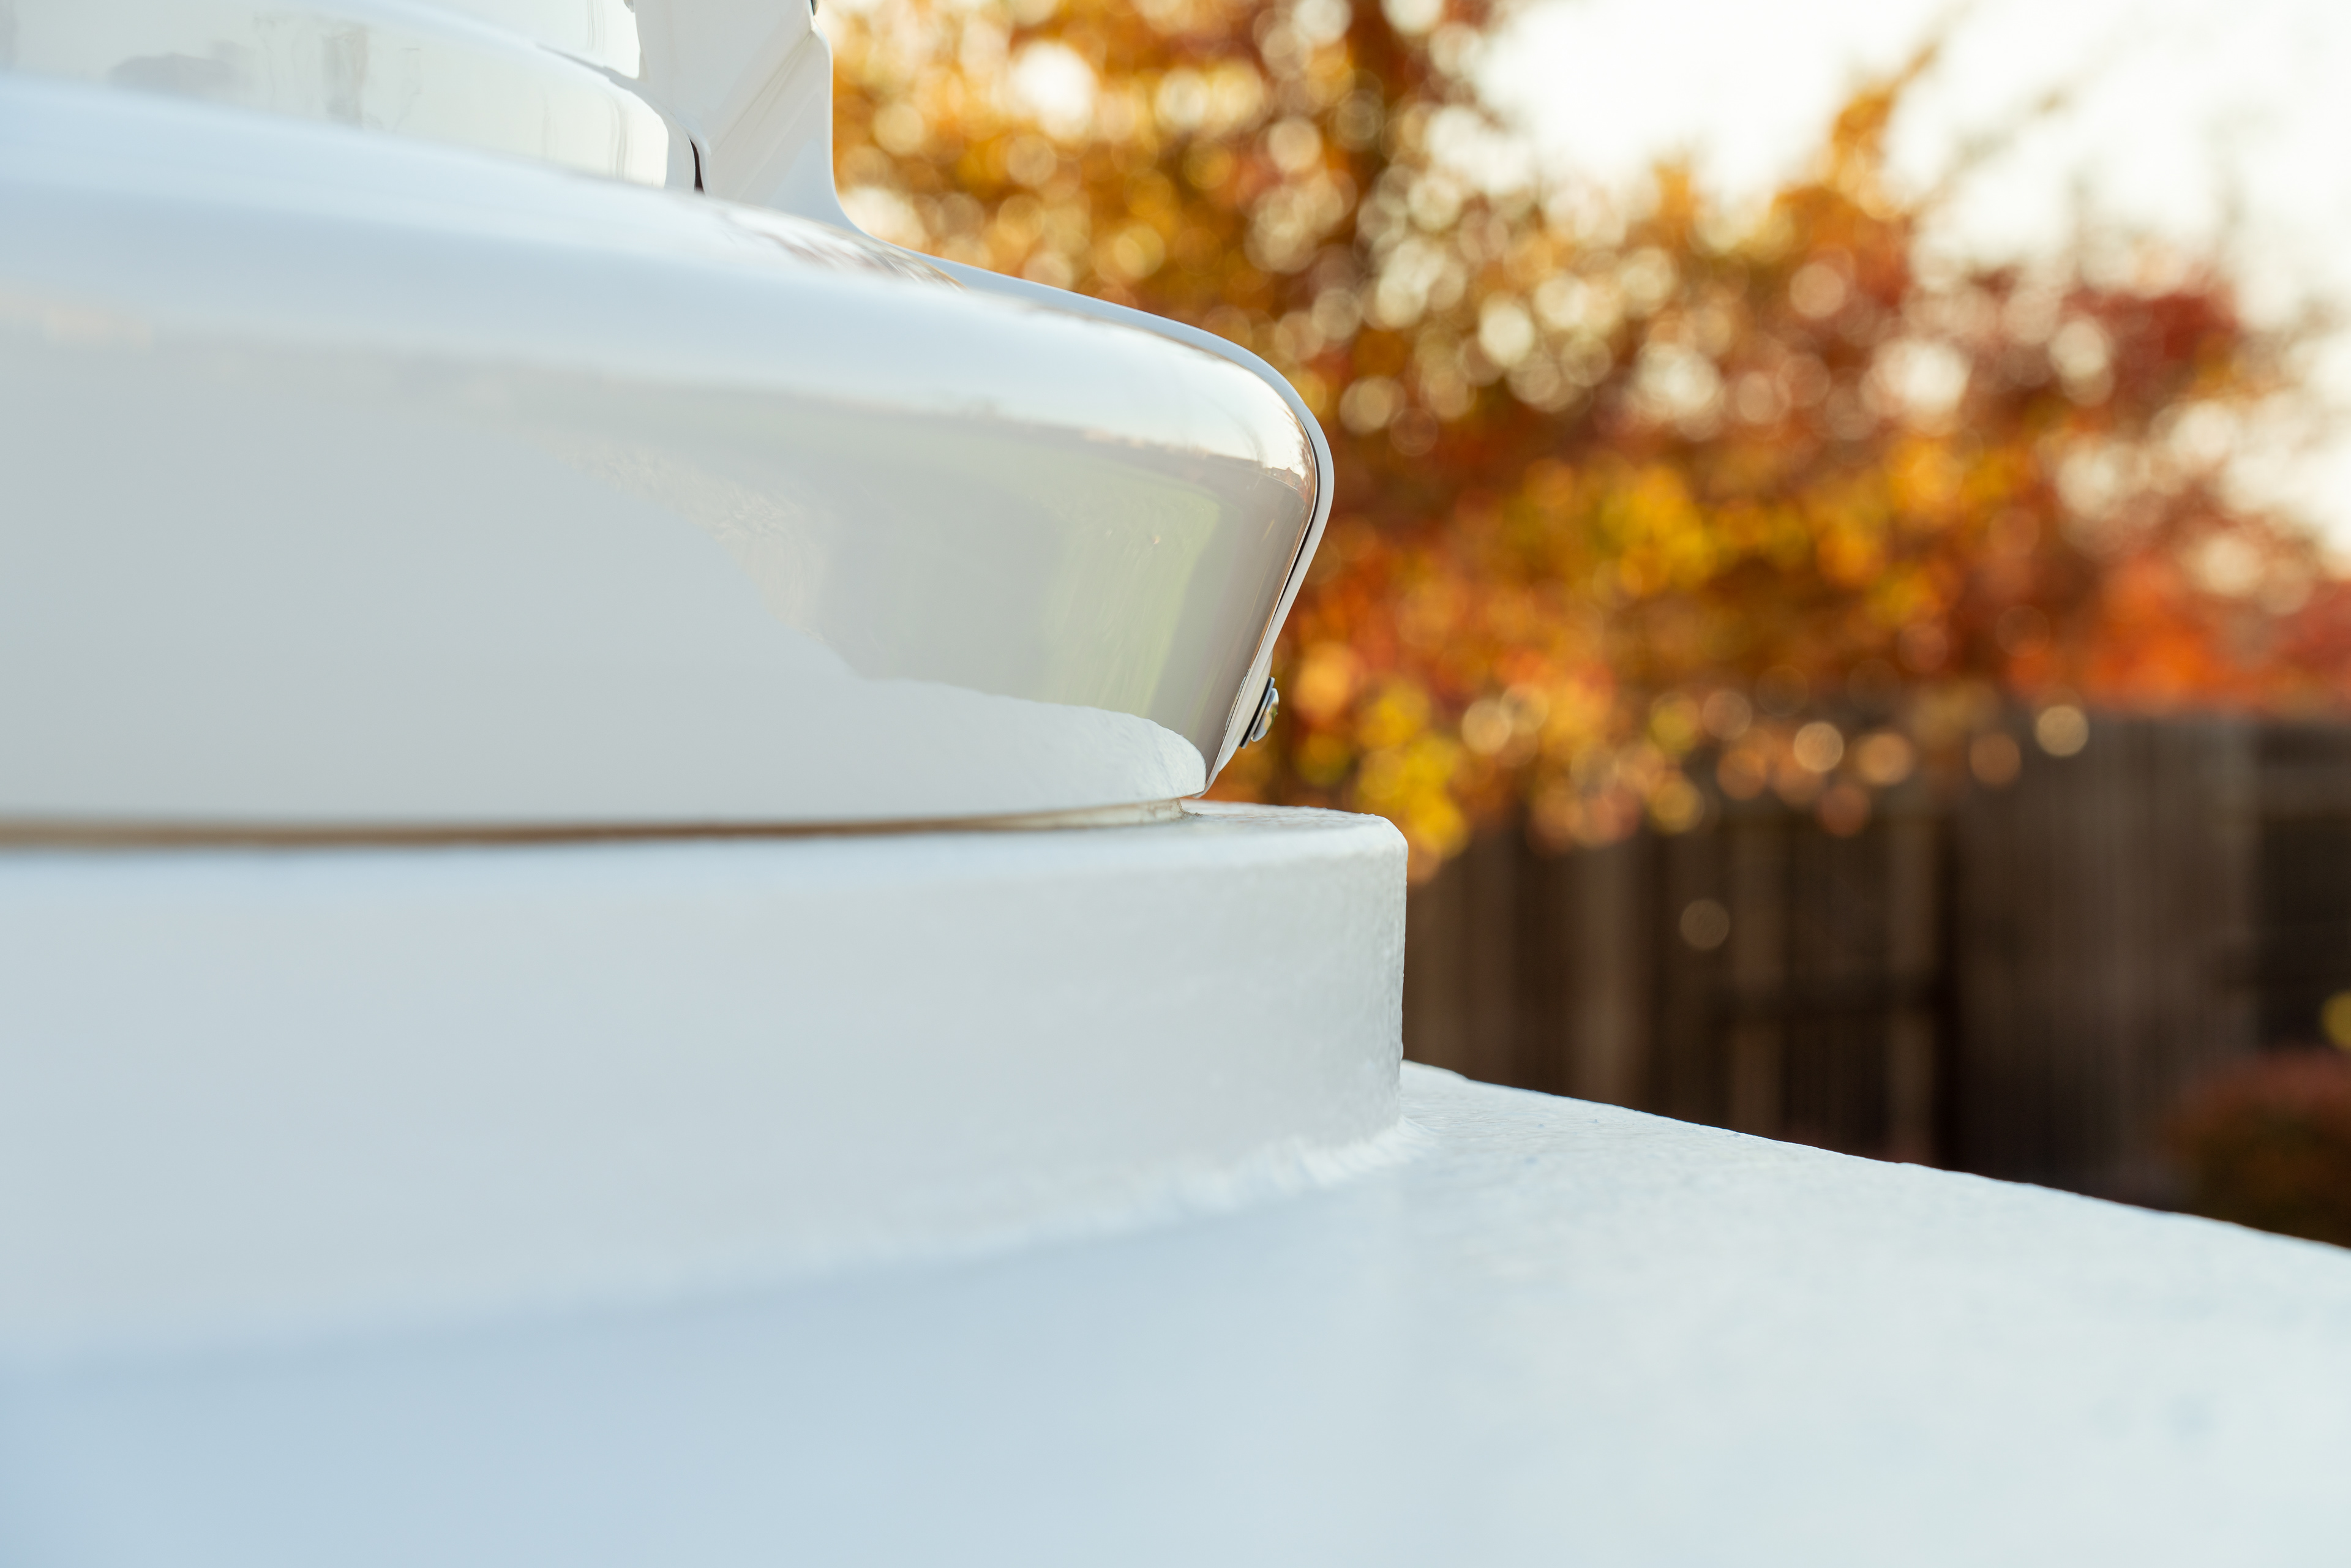
Finally, to address the remaining 3/16" gap between the dome and the base platform I have constructed a simple but very effective barrier ring made of exterior-grade MDF lattice moulding. These are 1/4" thick by 1 3/4" tall flexible planks that come in 8' length and bend perfectly into a round circle. Since I no longer had the bulky ABS sections of the original ring in the way, there was ample room to properly position and secure the weather barrier, precisely where it's needed most: immediately next to the dome lip.
I've screwed/glued together two sets of the planks bak to back and then attached the new barrier ring to the base platform with small l-brackets between the rollers and the dome lip. I've then sealed them all around with exterior grade caulk. I then repeated the same process on the inside, around the inner perimeter of the roller brackets, although that was more for a finished look than anything else. The result is a truly weather-sealed dome ring that doesn't let any water in even if I directly point a heavy stream from an open hose. The gaps are so small that I don't even feel any draft inside when there are 55mph winds raging outside.
Needless to say, any potential uplift is practically reduced to just about zero as well.
Weather barrier ring installed and glue is curing
Before caulking

Another view
Another view
No more gaps
Clean and finished look
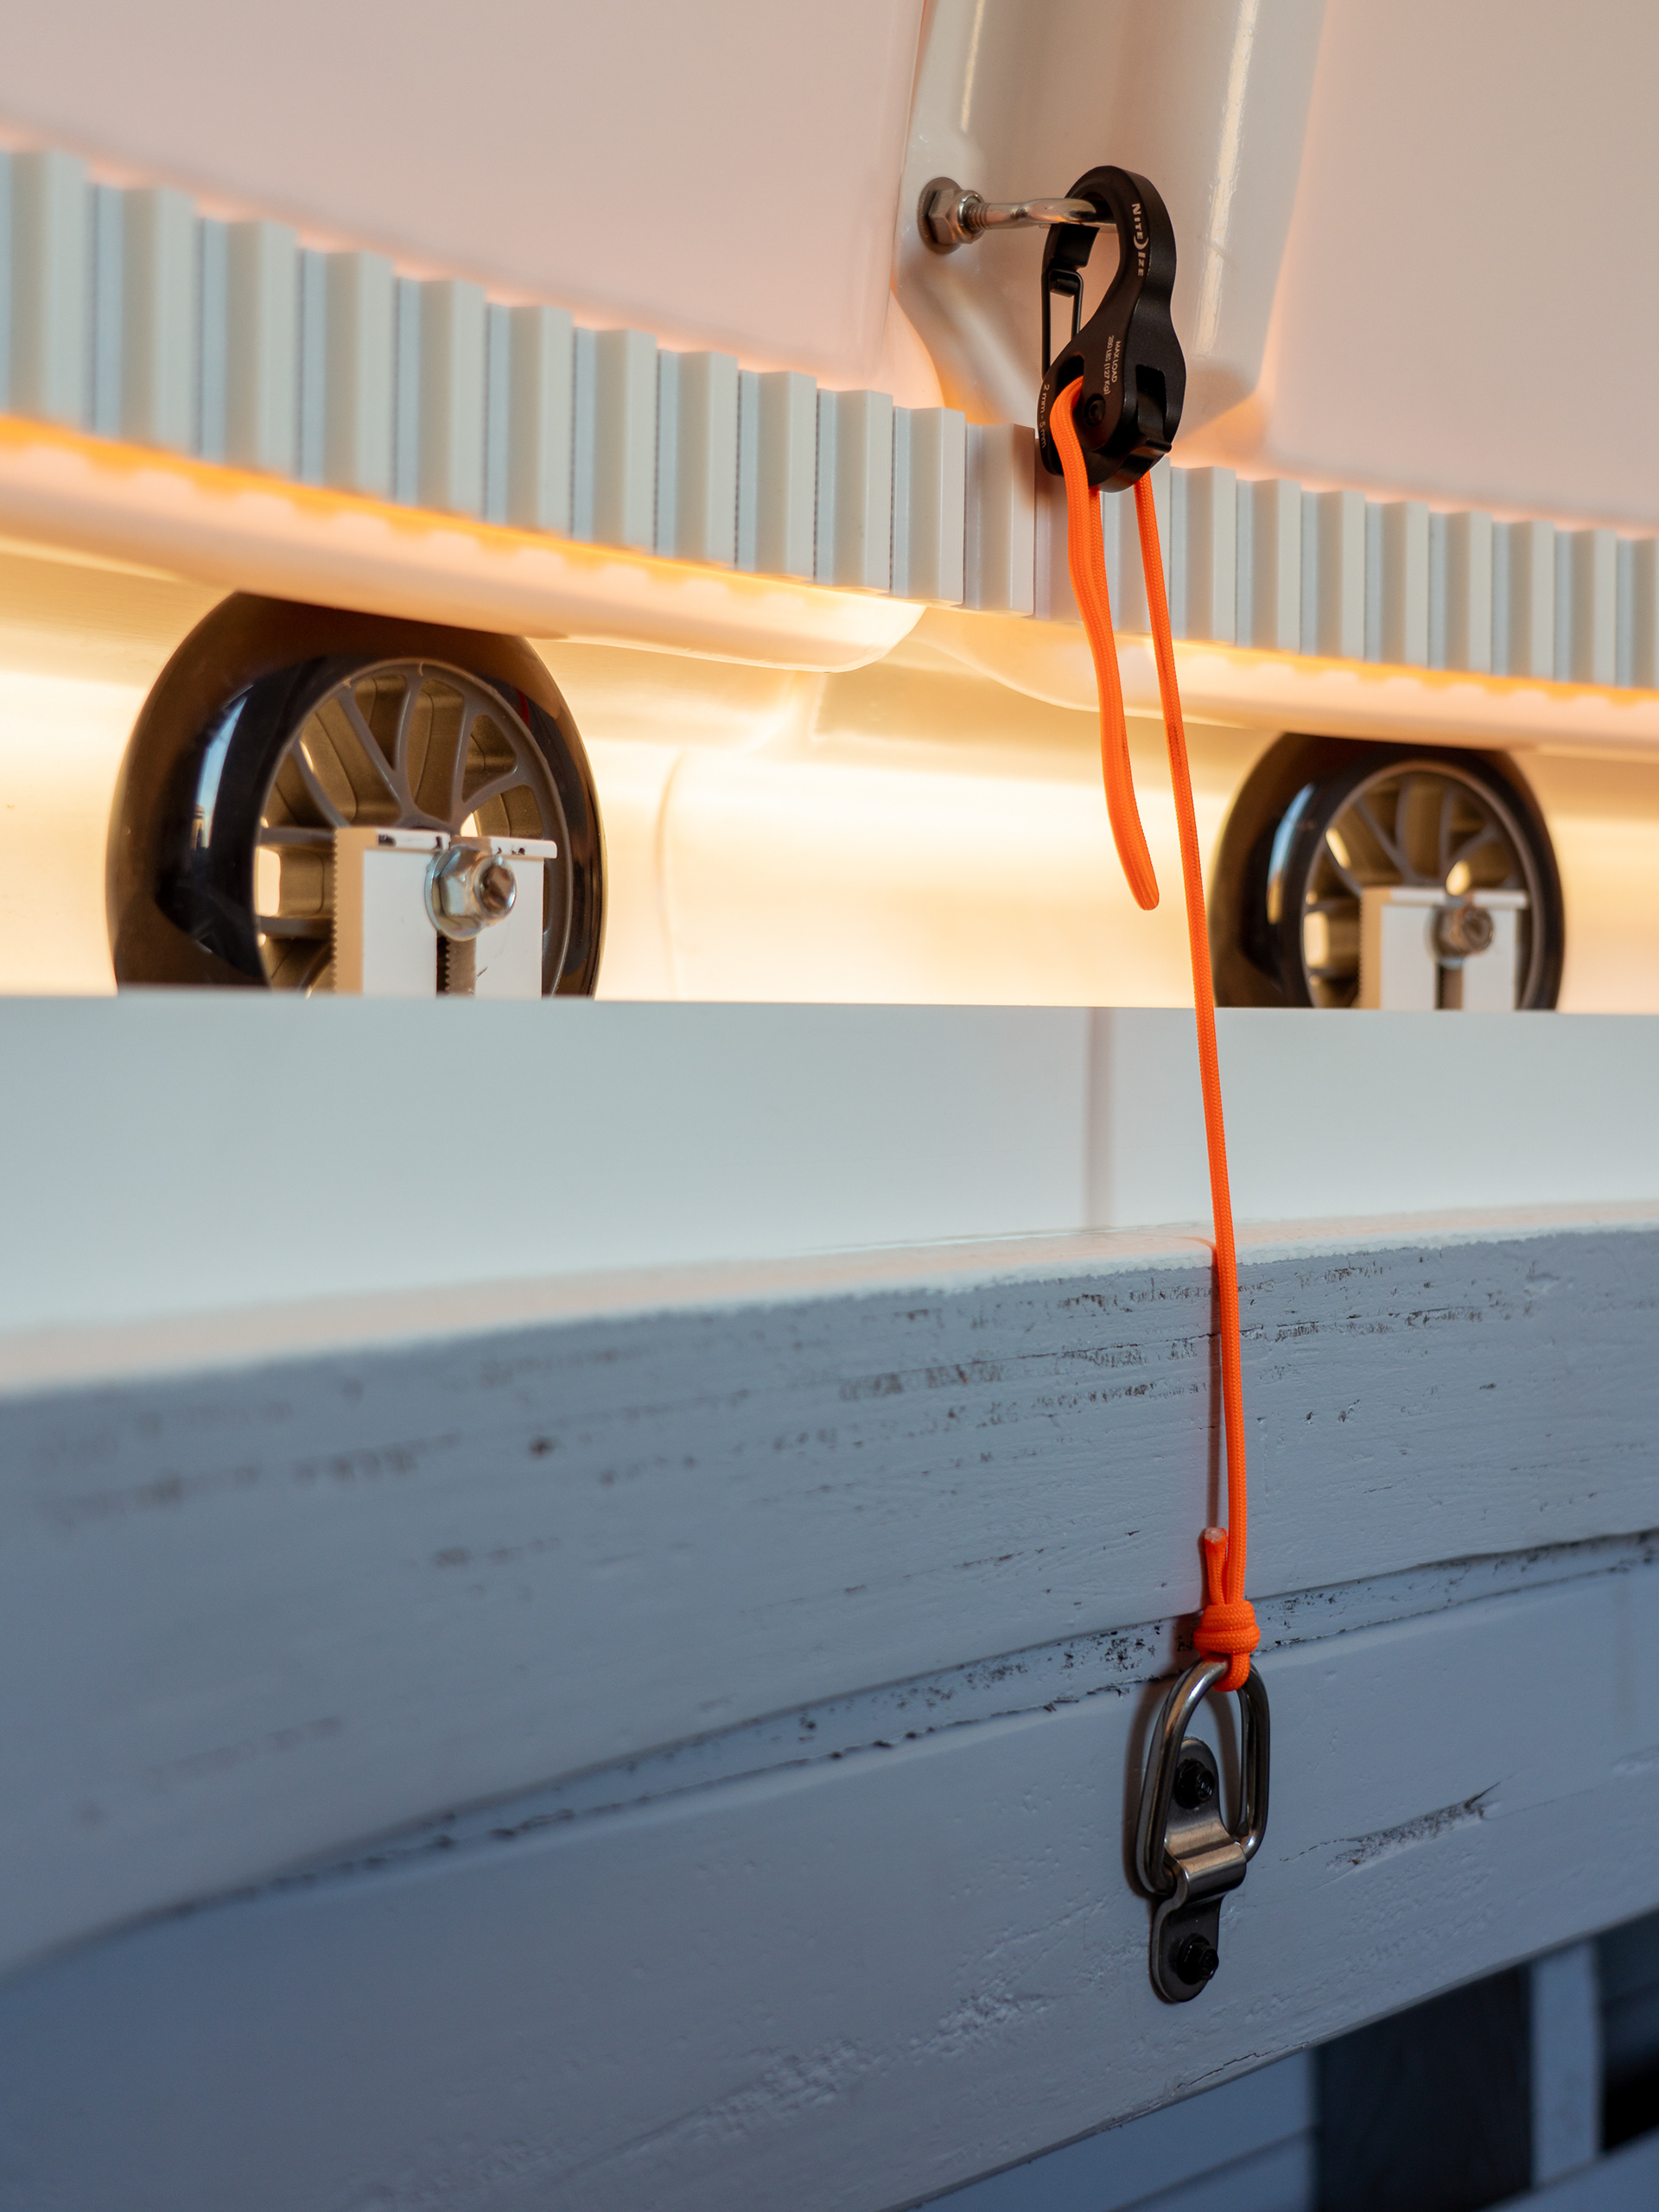
SECURING DOME...
As described above, new "ring" solution on which the dome now rides has significantly improved any uplift incidents. But, just to make sure, I've also installed 4 rings on the inner roof studs and when not in use have the dome tied down with those as well. Unless there's apocalyptic hurricane that rolls through the neighborhood, this thing isn't flying off anywhere anytime soon.
Inside view
Retaining rollers in place

Inner ring